Internal career page: publish and receive applications
Publish the job, let candidates apply on the career page, and watch each applicant land in a project at POSITIVE RESPONDED with Schedule Round 1 next.
2 min read
Publish a job to your career page, let candidates apply themselves, and each applicant arrives already interview-ready. You need the Interview Scheduler enabled and a job drafted in Job Builder first — see "Enable the Scheduler and create a job". Applicants enter at "POSITIVE RESPONDED" with "Schedule Round 1" next, skipping outreach entirely.
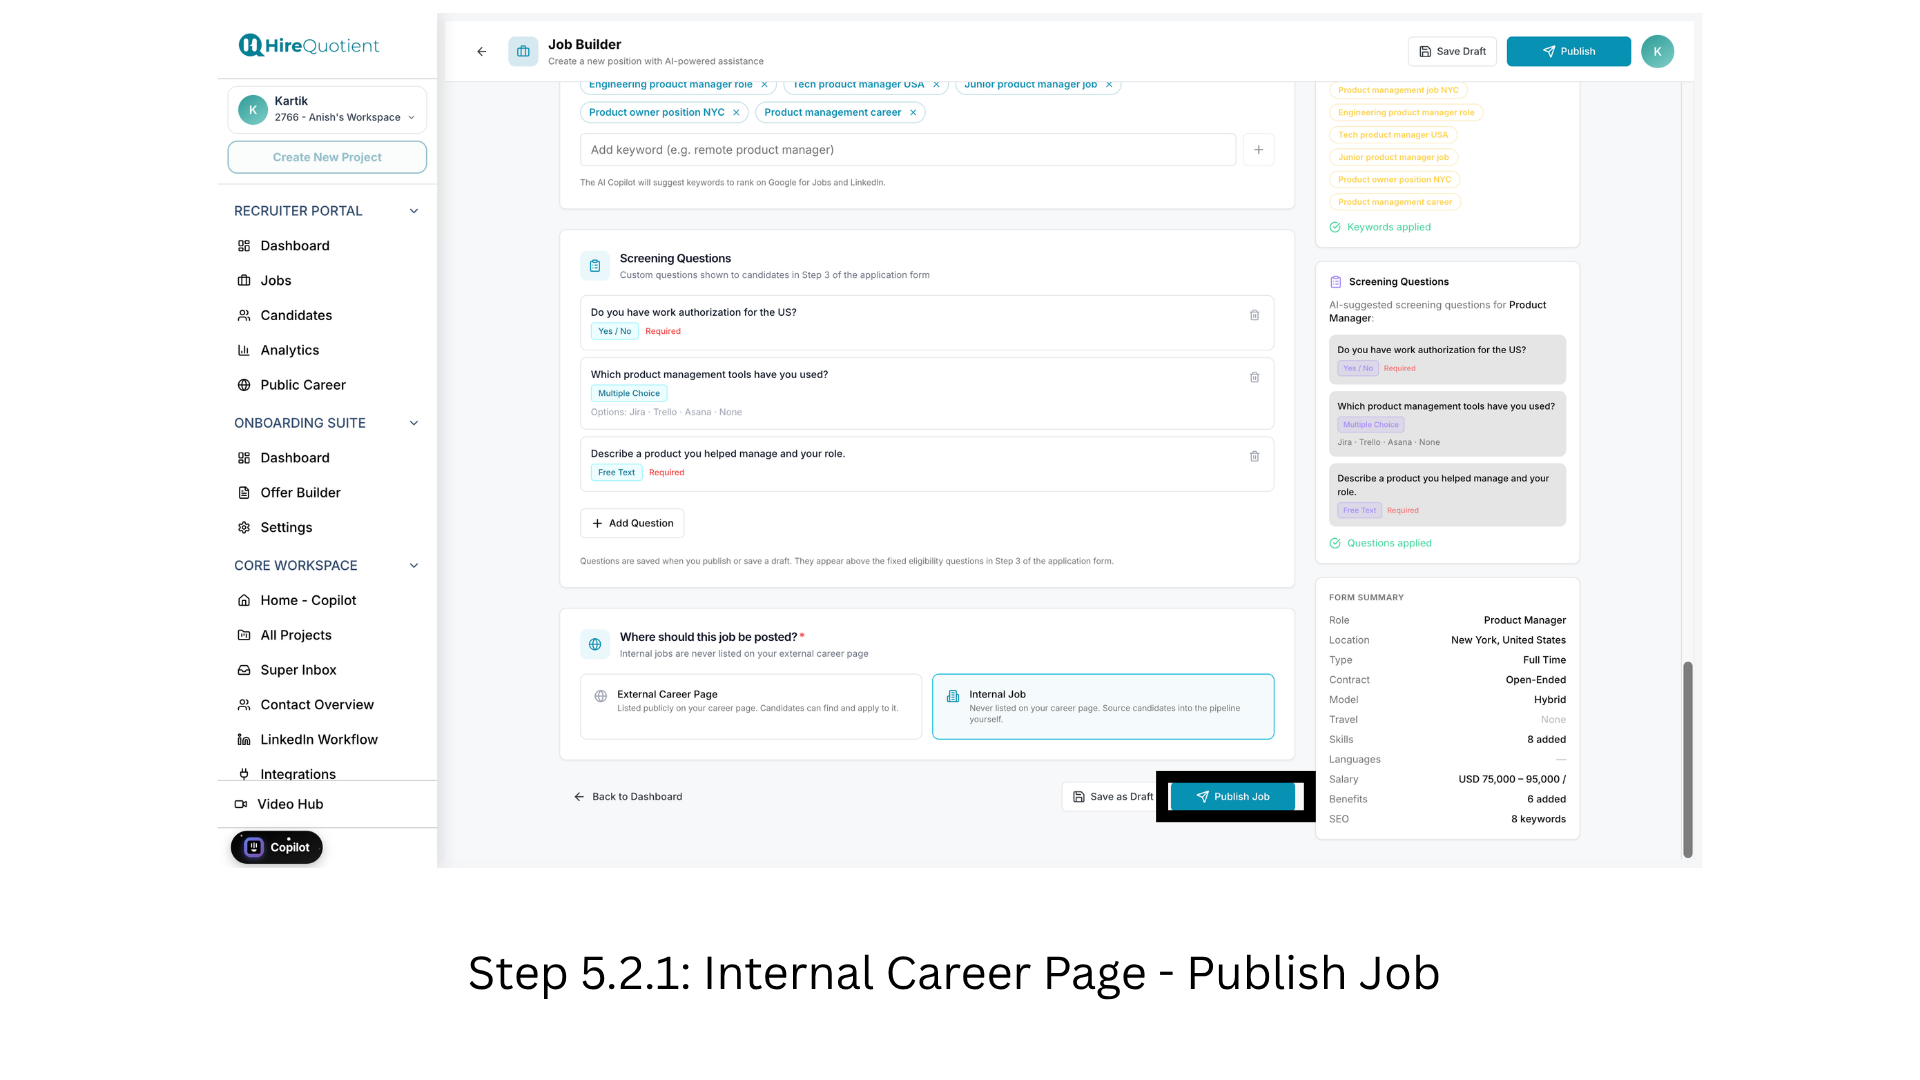
- 1Choose where the job is posted, then publishIn Job Builder, scroll to "Where should this job be posted?", choose External Career Page or Internal Job, then click Publish Job. One discrepancy: the screenshot shows the Internal Job card selected, whose helper text says it is never listed on your career page — odd, given the self-apply screens that follow.
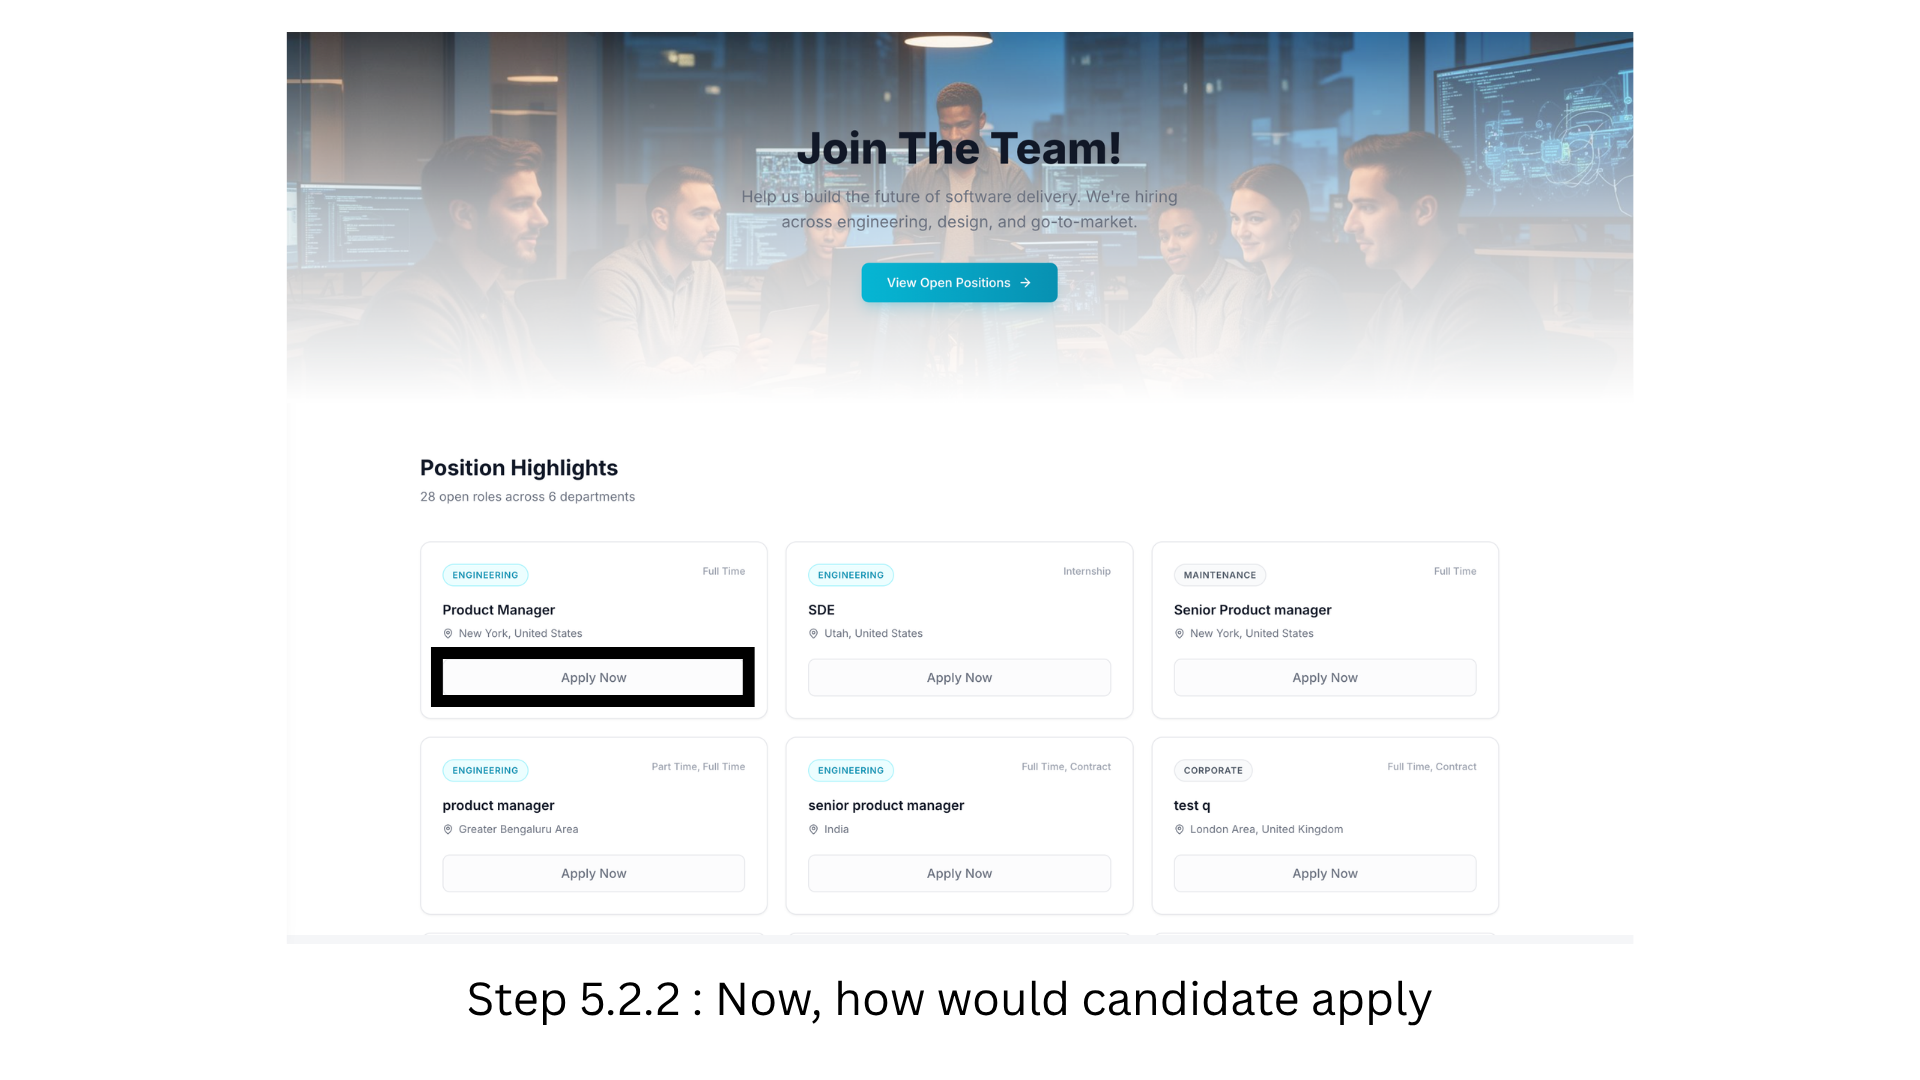
- 2Candidate view: find the role and click Apply NowCandidate's screen now: the public career page (open it yourself from Public Career). Position Highlights lists live postings as cards showing department, employment type and location, each with an Apply Now button. Whatever you typed as the job title is what the public sees, so tidy vague titles before publishing.
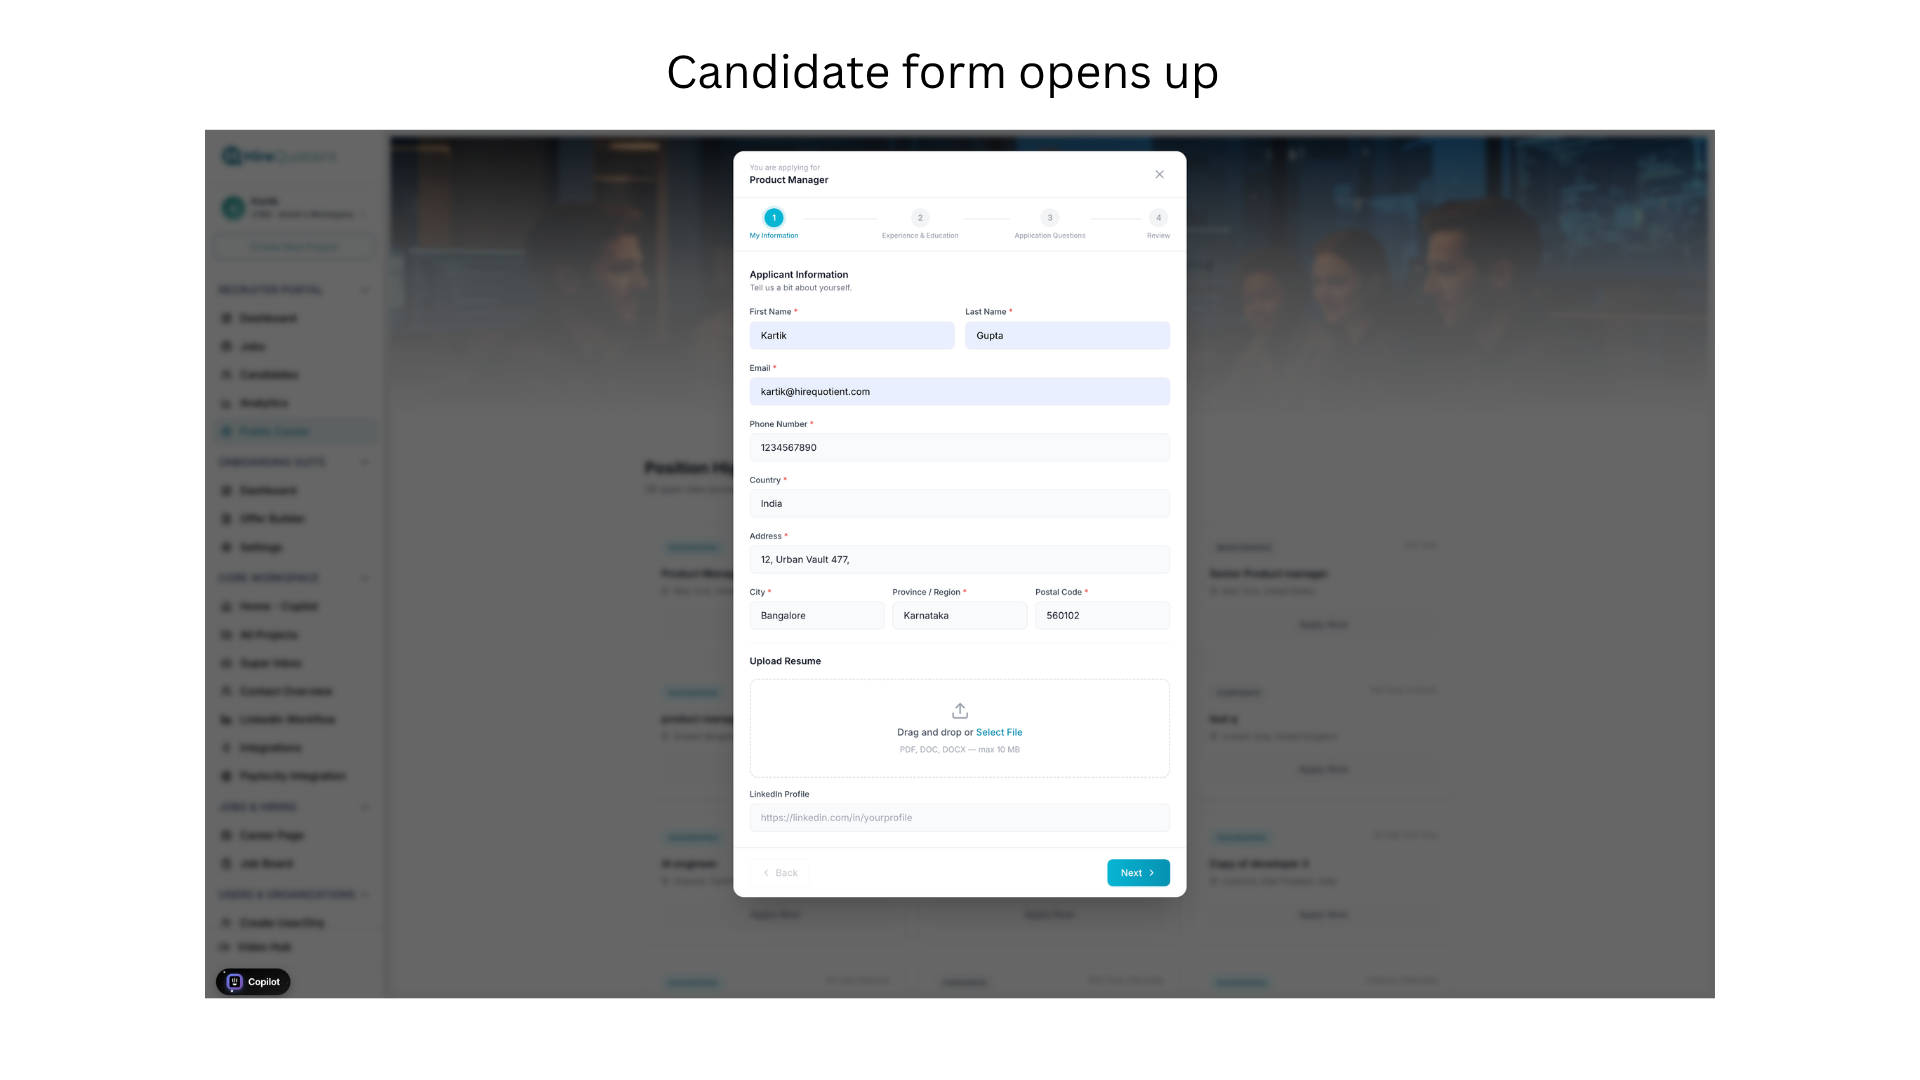
- 3Candidate view: applicant informationApply Now opens the application form as a modal — the candidate's screen, with a four-step bar: My Information, Experience & Education, Application Questions, Review. Step 1 collects name, email, phone and address, all required. Upload Resume and LinkedIn Profile are not required, so use a screening question if a resume is mandatory.
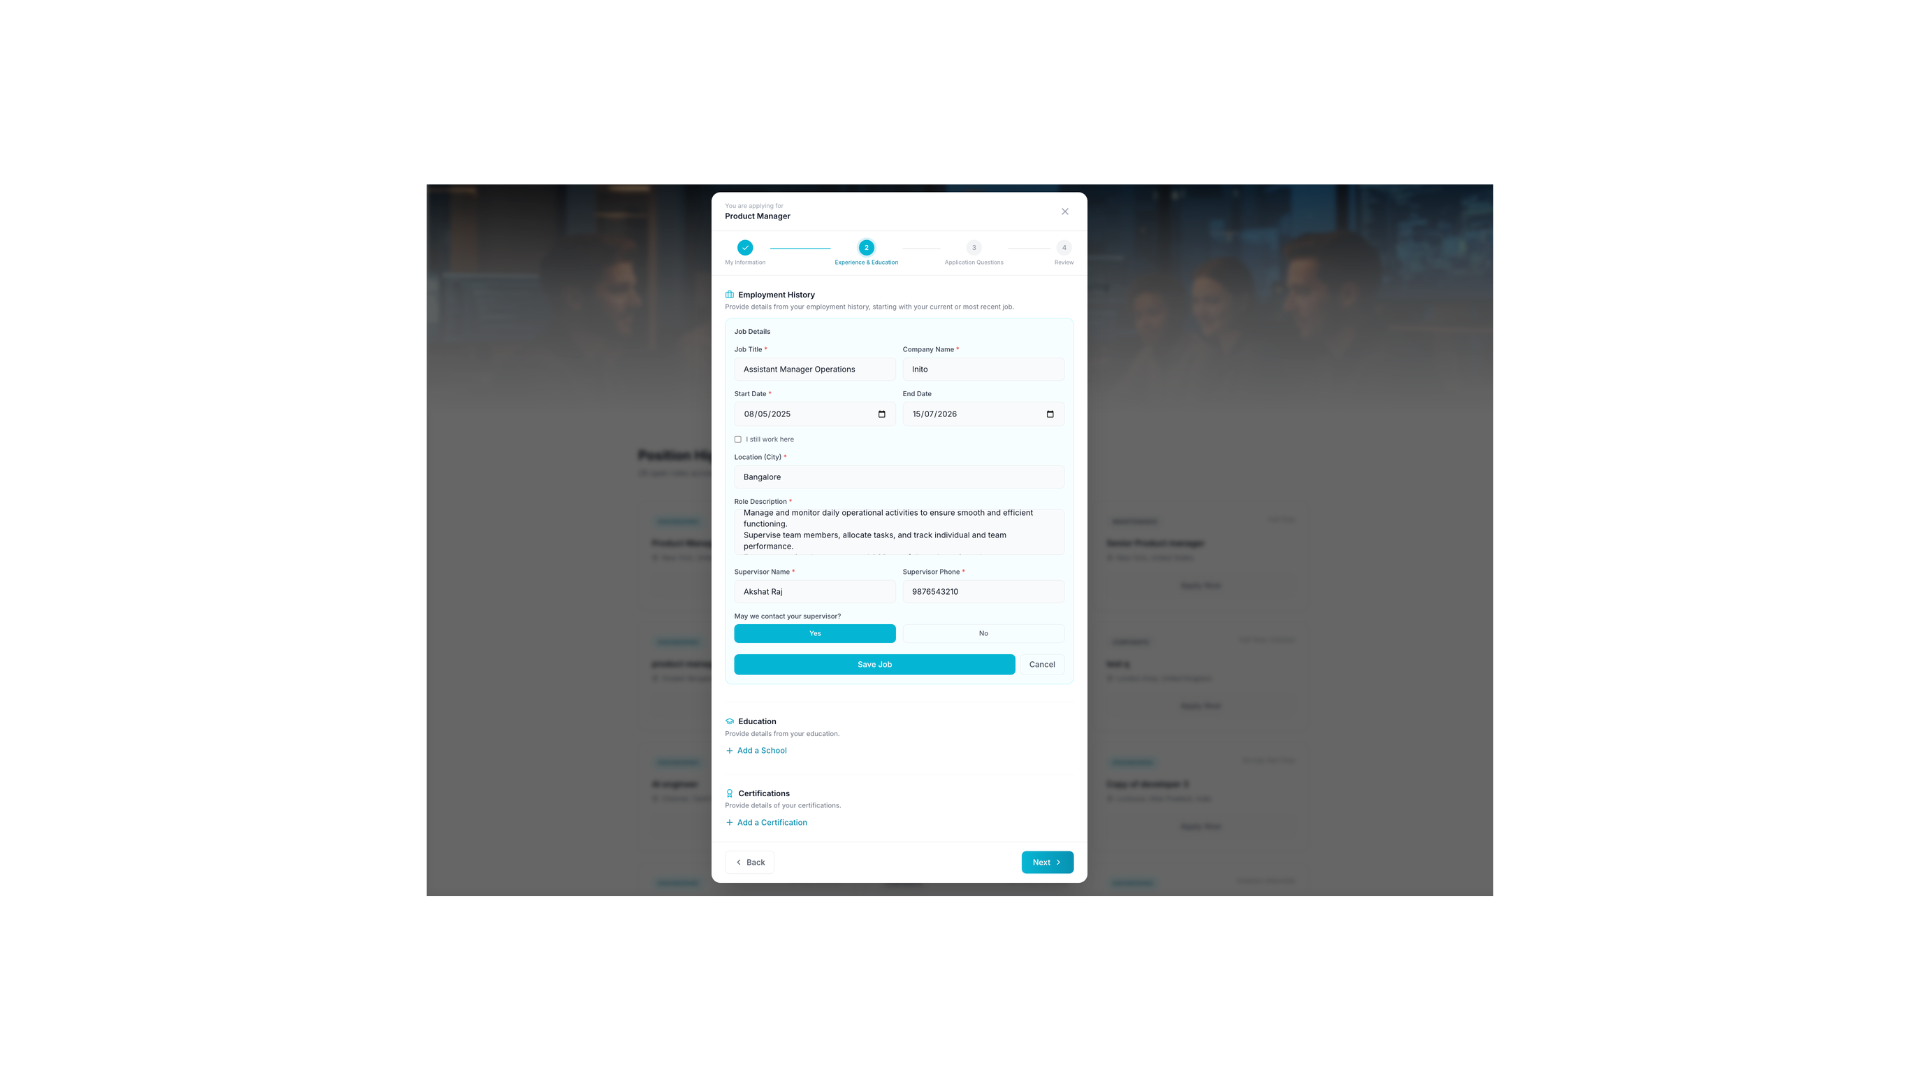
- 4Candidate view: employment history and educationStep 2, Experience & Education, gathers structured work history: job title, company, dates, location, role description and supervisor contact, with Save Job committing each entry. Add a School and Add a Certification repeat as many times as needed. None of this comes from your screening questions — the form always collects it.
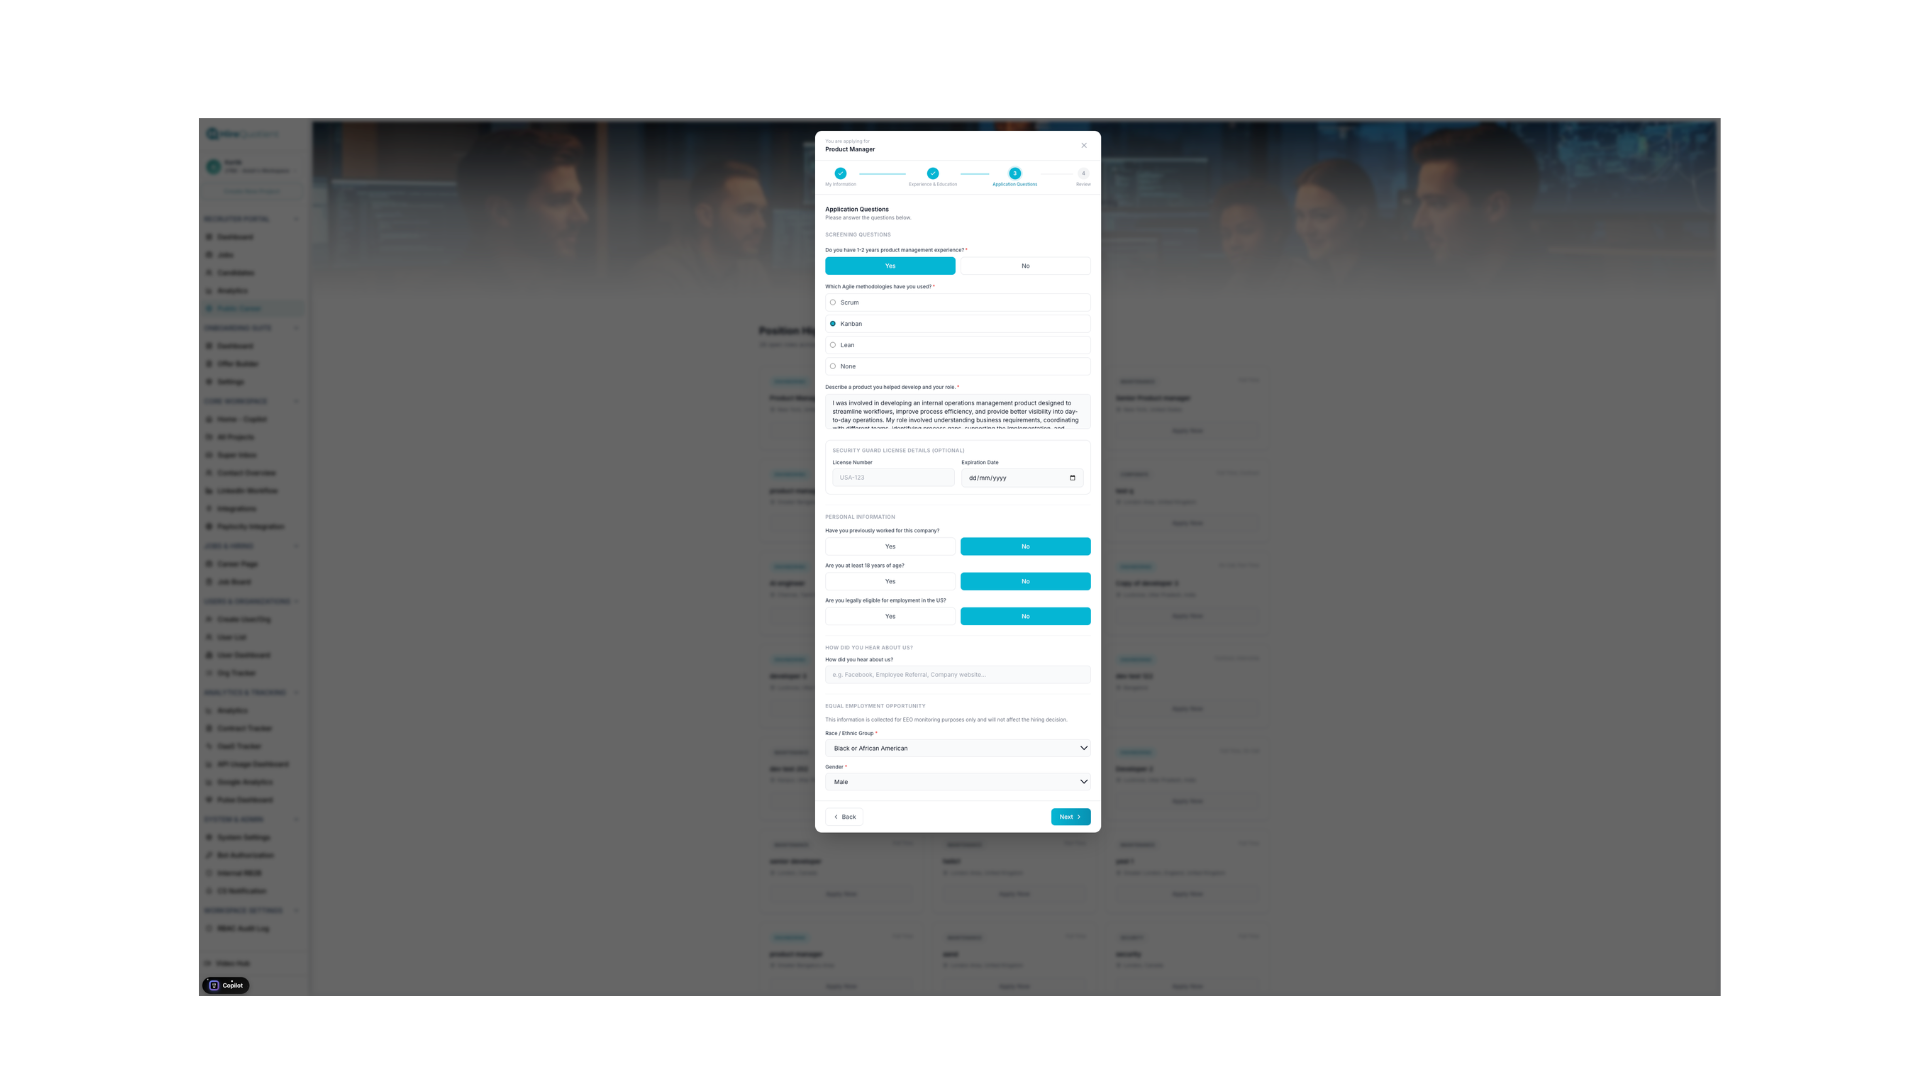
- 5Candidate view: screening and eligibility questionsStep 3, Application Questions, shows the screening questions you attached to this job, followed by sections the form always includes: PERSONAL INFORMATION eligibility toggles, HOW DID YOU HEAR ABOUT US? and EQUAL EMPLOYMENT OPPORTUNITY. Every answer is stored as a structured field, so write questions that genuinely separate applicants.
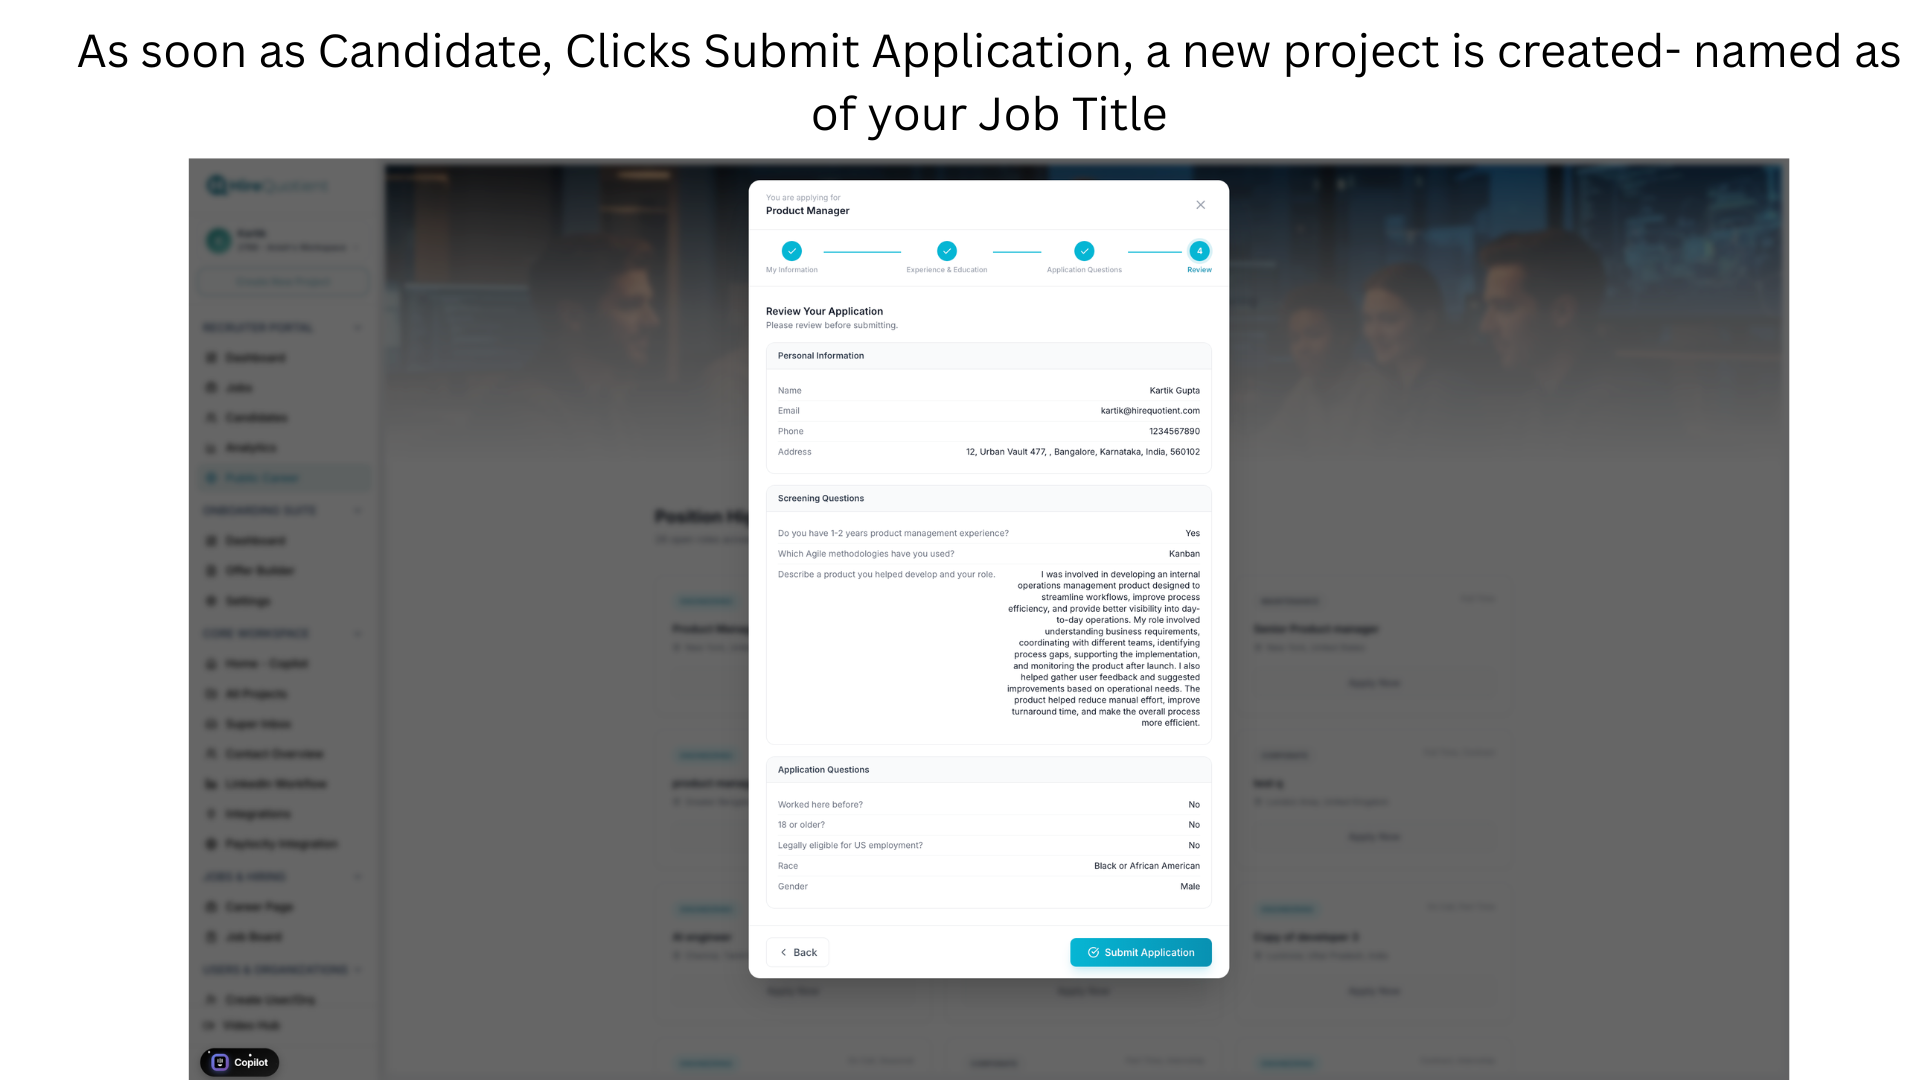
- 6Submit, and the application opens a projectStep 4, Review, recaps the answers; Back corrects them and Submit Application commits. Submitting creates a project named after the job title, with the applicant already at "POSITIVE RESPONDED" and "Schedule Round 1" as their next step. That button errors until the job's rounds exist, so go to "Set up interview rounds" next.