Enable the Scheduler and create a job
Enable the Interview Scheduler Agent and next-step toggles, then create and publish a job in Job Builder - stage one of the interview scheduling flow.
2 min read
The Interview Scheduler runs your interview process end to end. This article covers switching it on for the account and creating the job everything else hangs off. If you don’t see the feature, please contact our Customer Support (CS) team for assistance.
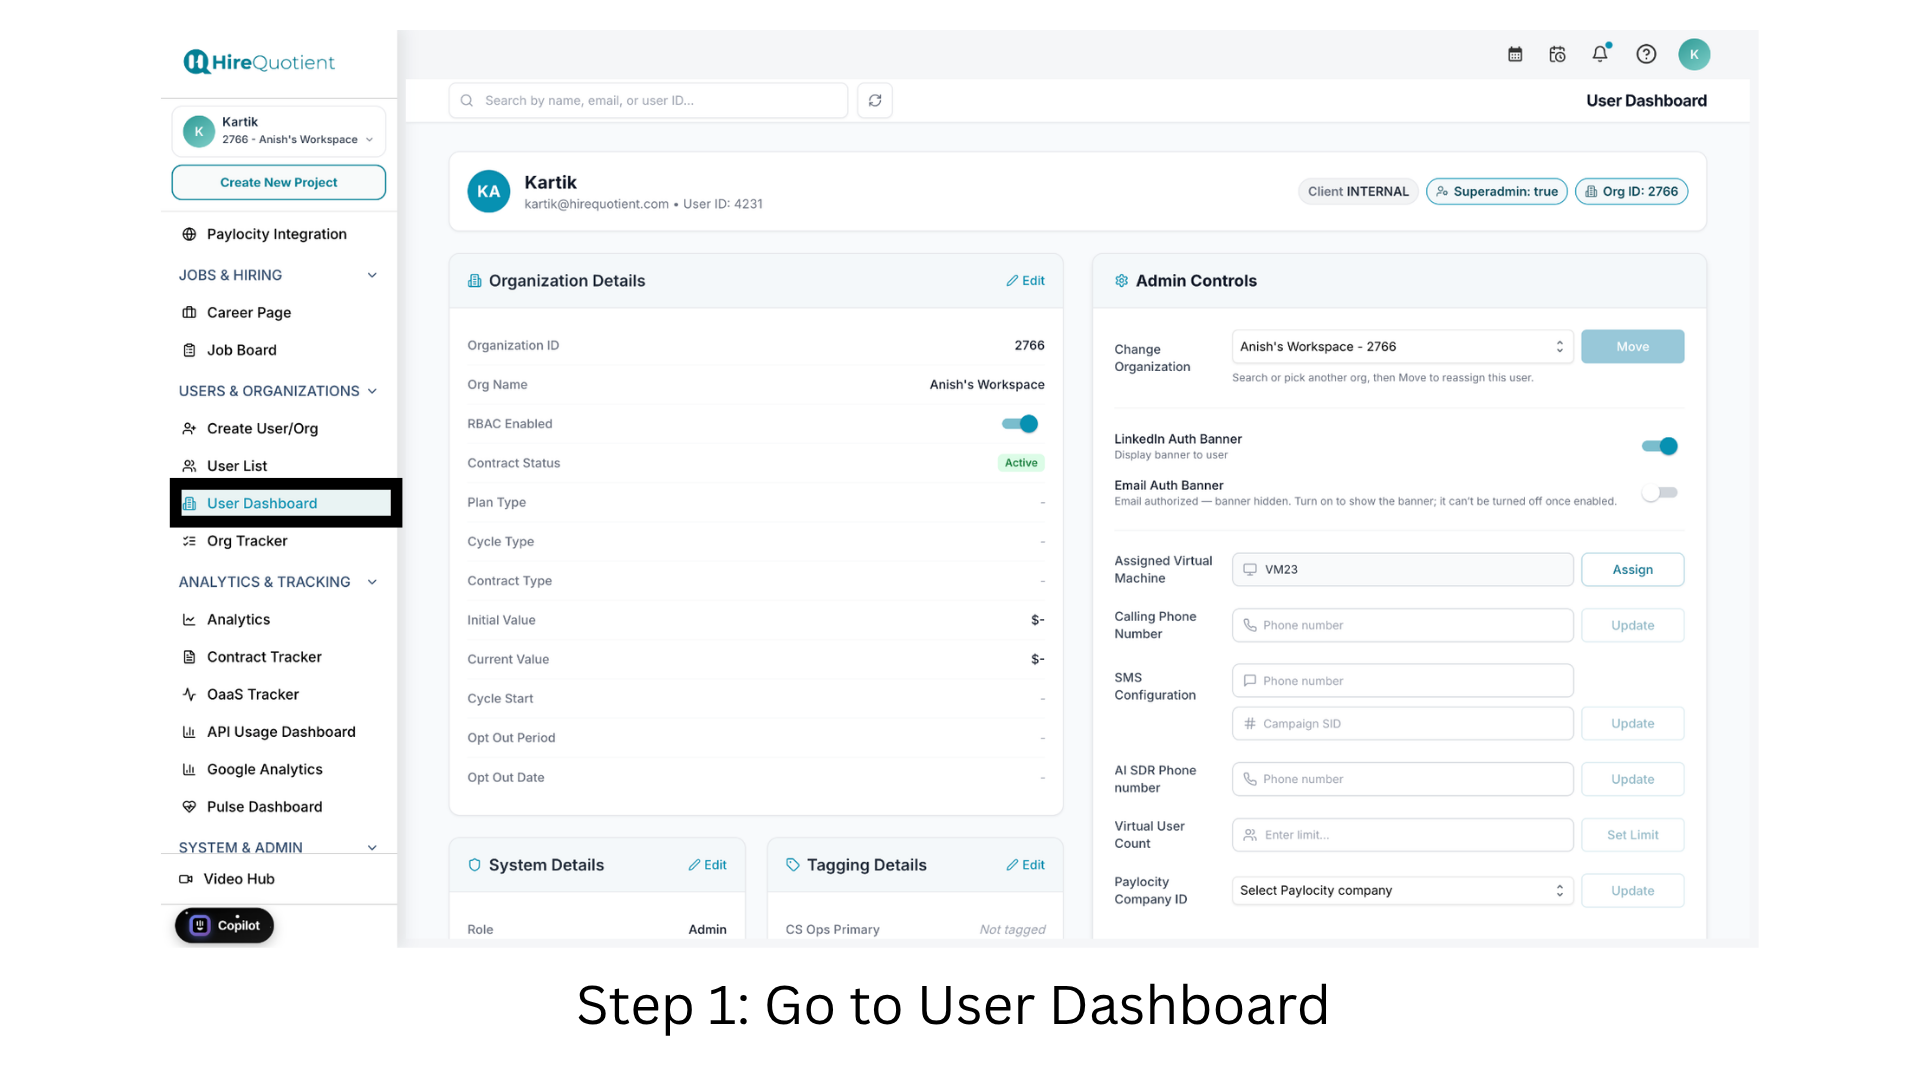
- 1Open the User DashboardIn the left sidebar, expand USERS & ORGANIZATIONS and select User Dashboard, then find the account with the "Search by name, email, or user ID..." box. Confirm the workspace in the top-left switcher is the one you mean to change - the toggles apply to that account. If User Dashboard is missing, your login lacks the permission.
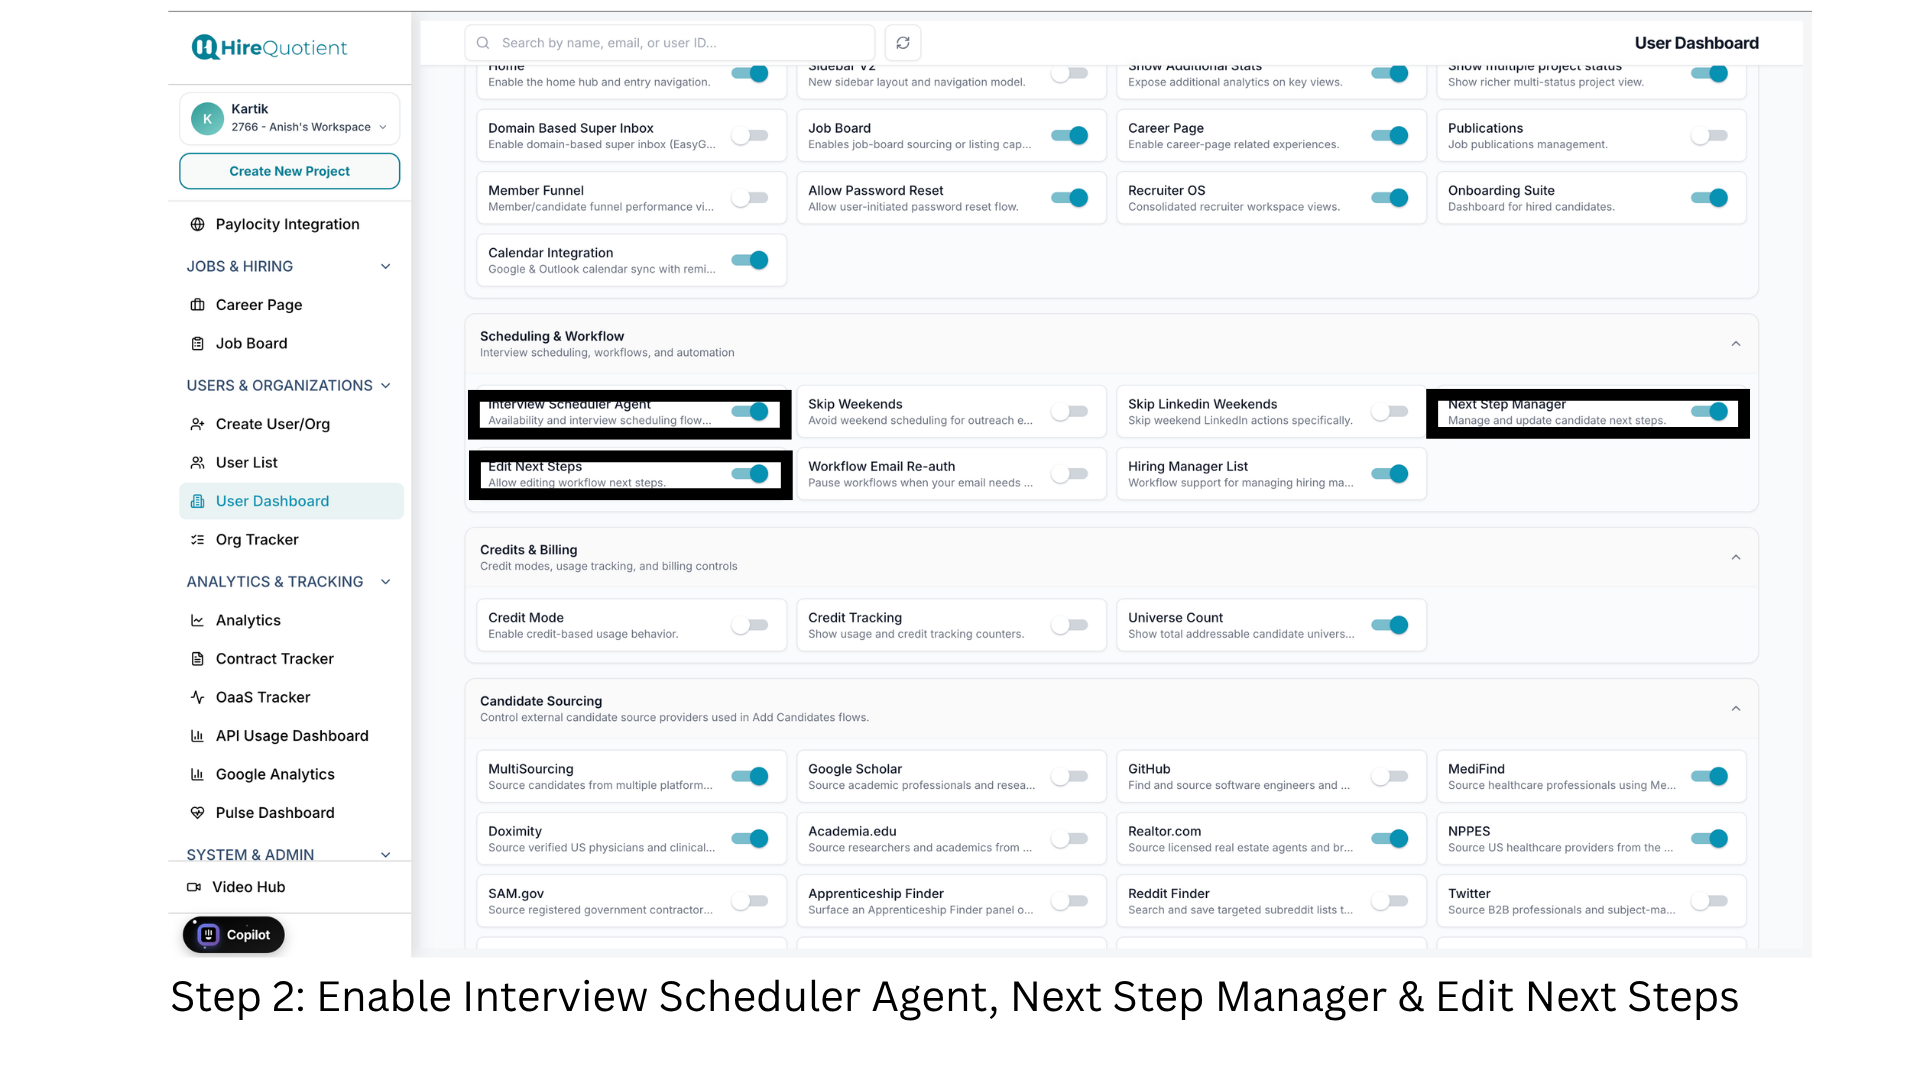
- 2Turn on the Interview Scheduler togglesScroll to Scheduling & Workflow and switch on three toggles: Interview Scheduler Agent, which automates the whole scheduling flow; Next Step Manager, which generates next-step labels such as "Round 1 - Awaiting HM Slots"; and Edit Next Steps, for correcting a label by hand. Confirm Calendar Integration is on so interviews sync to calendars.
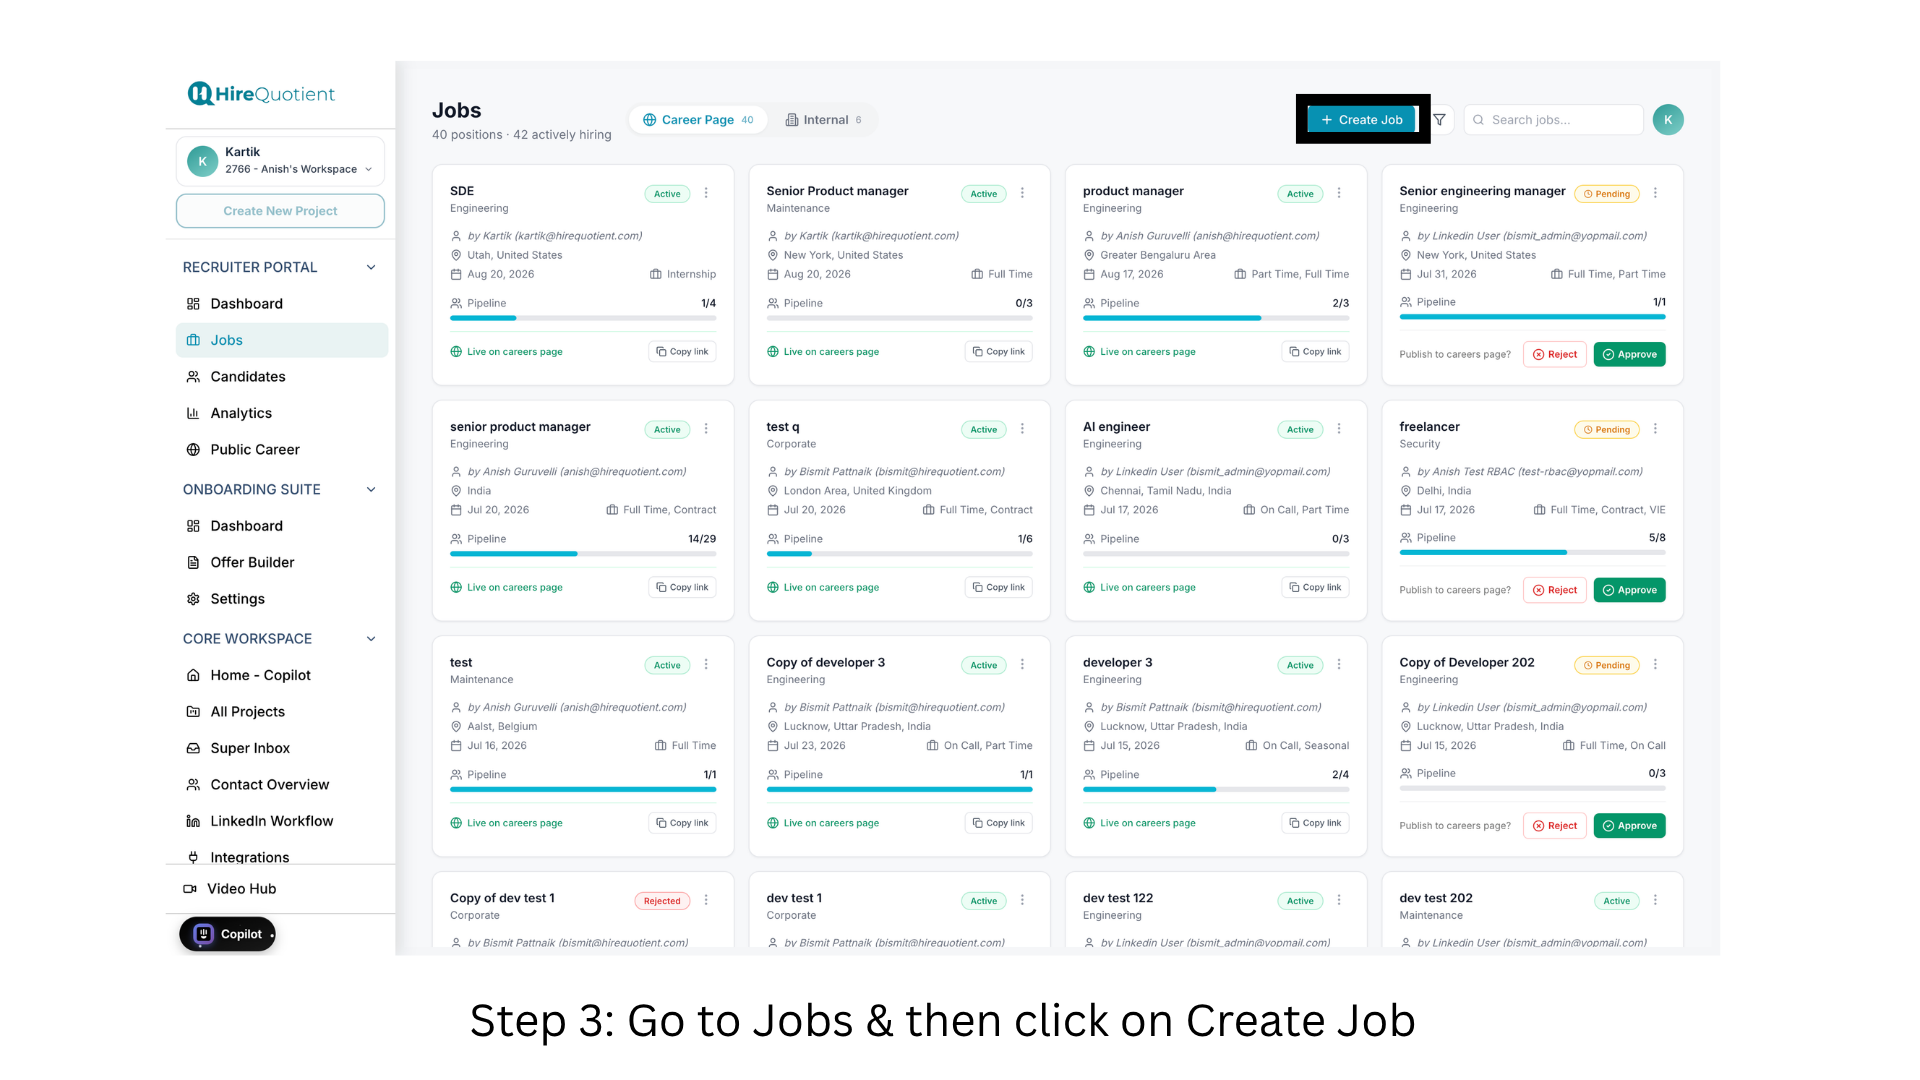
- 3Open Jobs and start a new jobSwitch to the recruiter workspace and open Jobs from the sidebar. Candidates, rounds and feedback all attach to a job, so nothing in the Scheduler works until one exists. The Career Page and Internal tabs mirror the publishing choice you make at the end of this article. Click + Create Job.
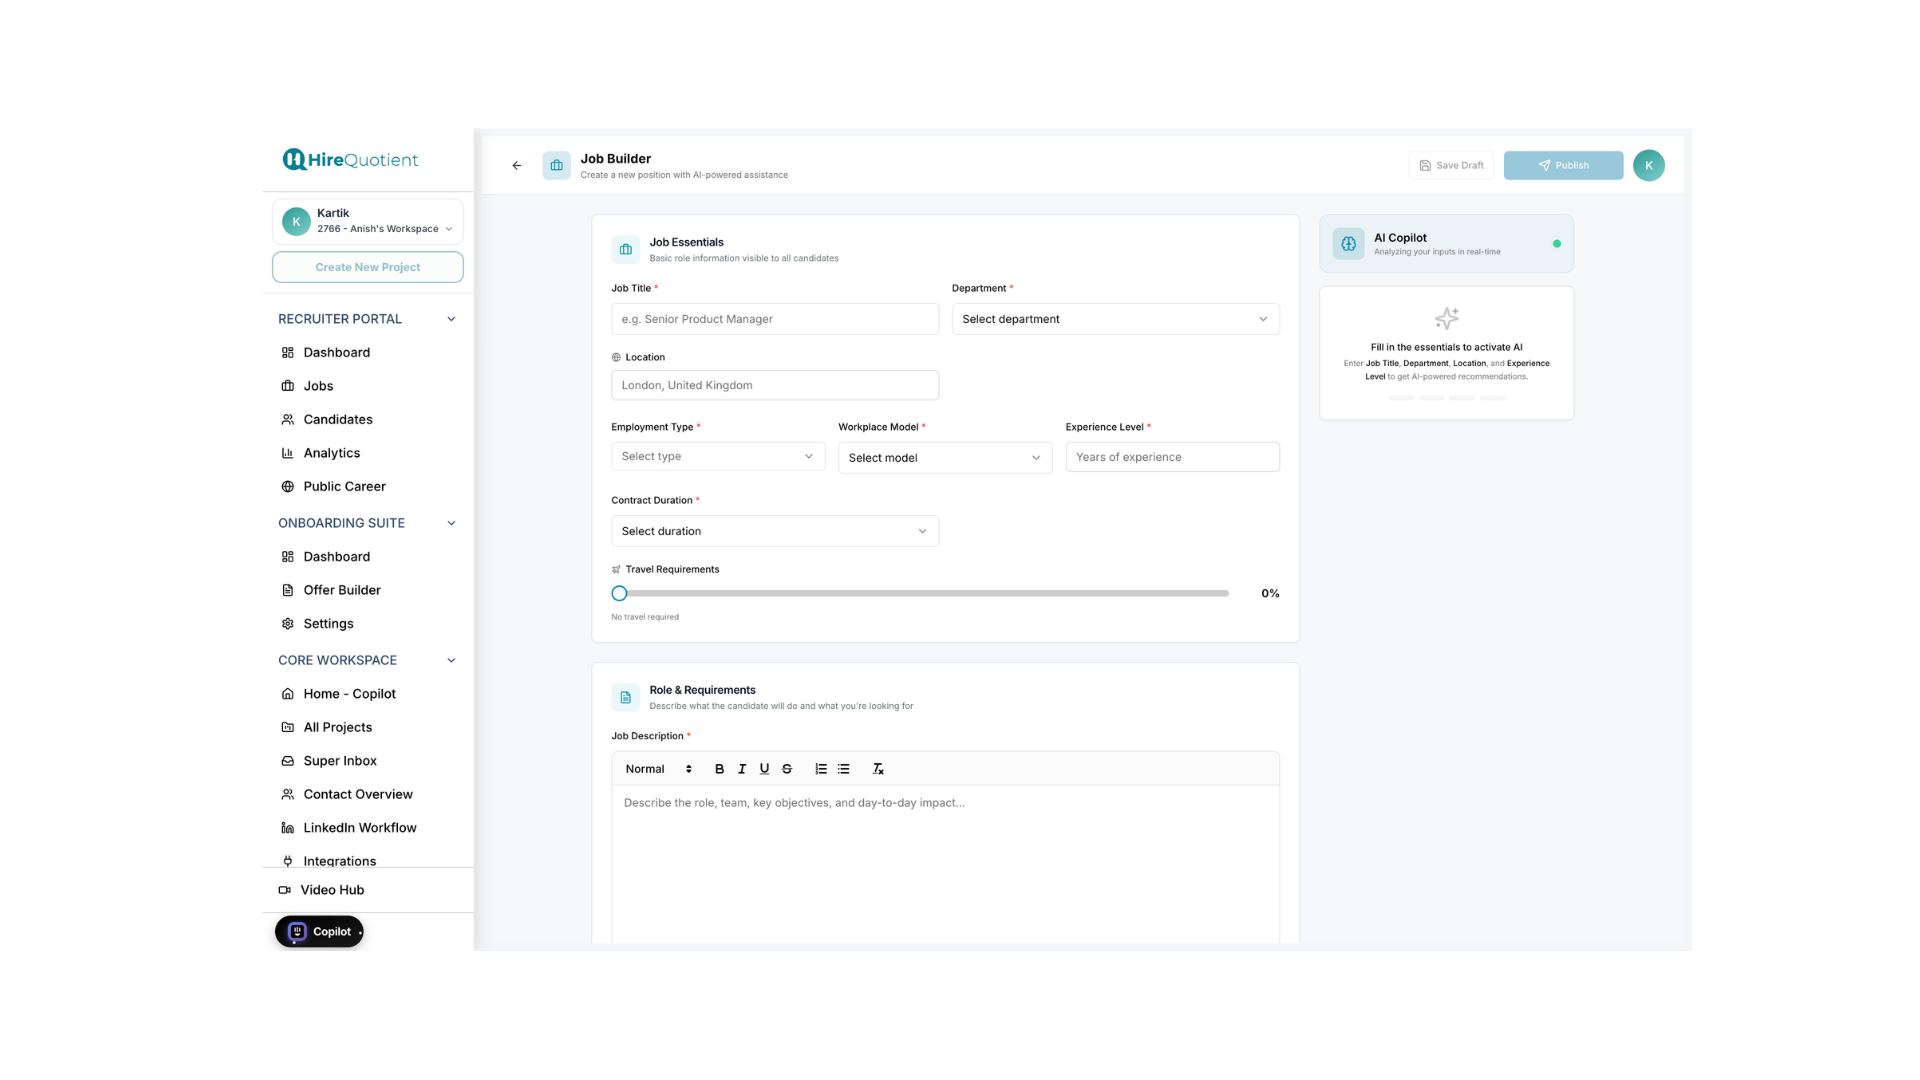
- 4Get to know the Job BuilderCreate Job opens the Job Builder. Fill in Job Essentials first - Job Title, Department, Location, Employment Type, Workplace Model, Experience Level and Contract Duration are all required - then write the Job Description under Role & Requirements. Nothing saves until you use Save Draft or Publish.
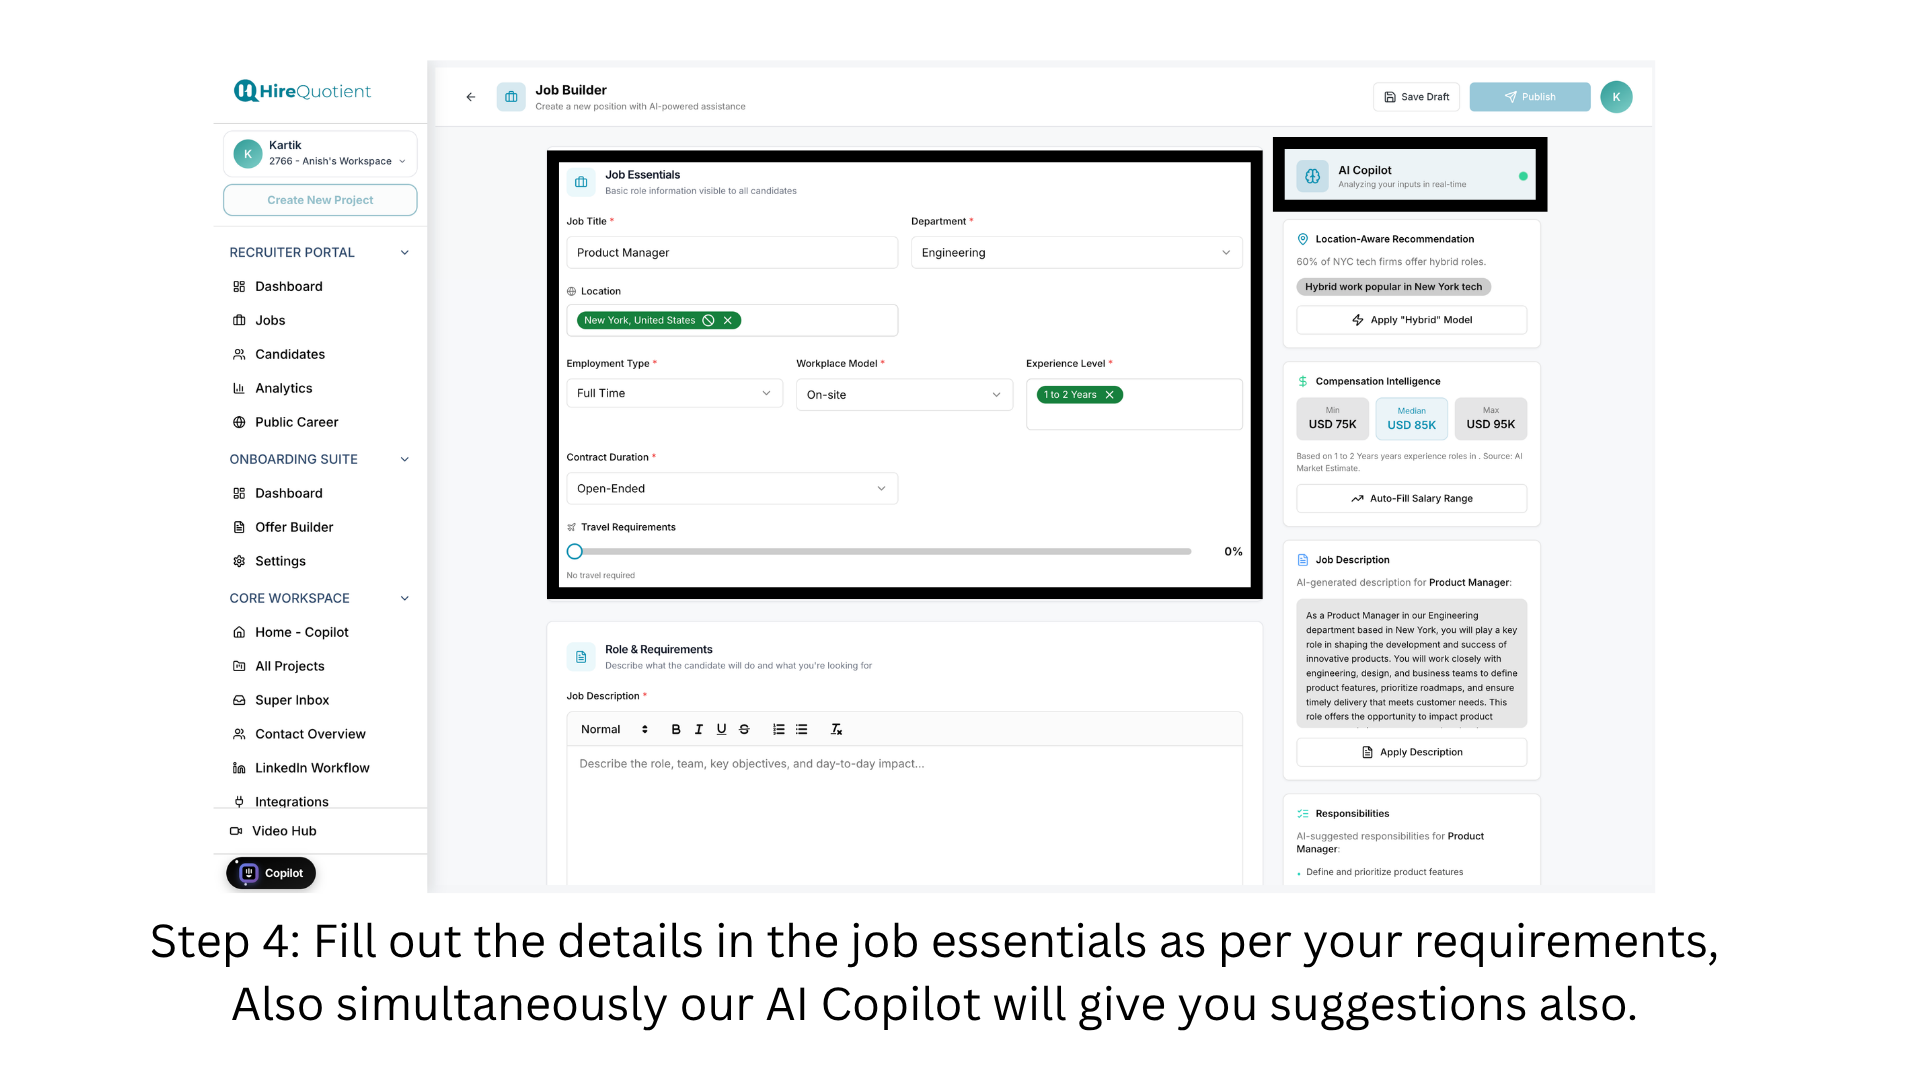
- 5Fill in Job Essentials and read the AI CopilotWith the essentials filled in, the AI Copilot activates and stacks suggestion cards down the right: market context for the location, a salary range, a drafted job description and suggested responsibilities. These are suggestions only - nothing changes until you click a card's Apply button, and salary figures are estimates to check against your own bands.
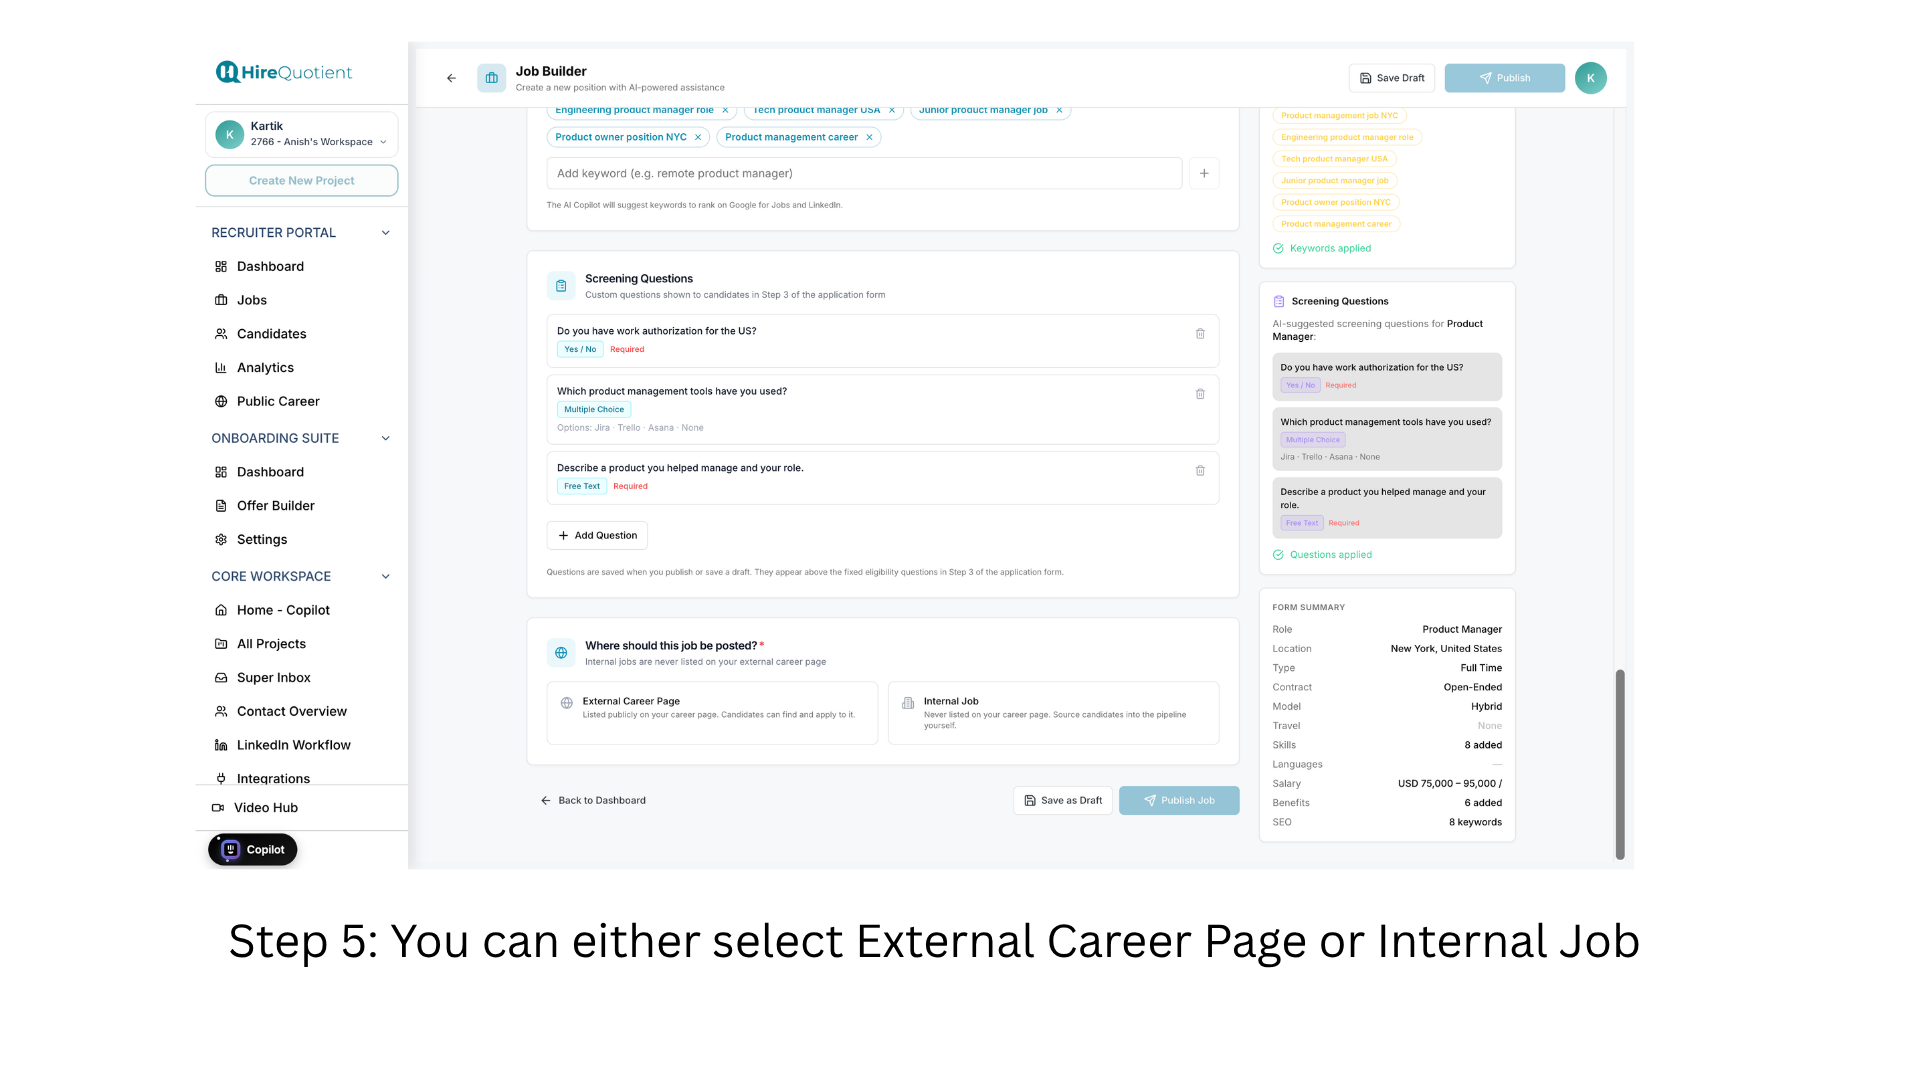
- 6Choose where the job is posted and publishFurther down, adjust the SEO keywords and Screening Questions, then answer the required "Where should this job be posted?": External Career Page lists the role publicly so applications arrive on their own; Internal Job never lists it and you source candidates yourself. Click Publish Job, then read whichever of the next two articles matches your choice.