
Set up document folders
Create and manage folders in Settings, tag files across them, and set up org-wide cost centers and data retention.
3 min read
Folders live inside the Policies for candidates section of Settings and let you group files instead of leaving them in one flat list. This adds folder-level organization on top of the policy library setup already covered in the existing Initial Setup article. This article also walks through the other org-wide Settings areas that have no screenshots of their own: background verification cost centers, data retention, and Do Not Hire retention.
- 1Create a folder in SettingsIn Onboarding Suite Settings, under Policies for candidates, click + Create Folder above the Uploaded files list. Folders organize the same file library used for the Mail Policies task. Opening this Settings page at all requires the "Register on OS" permission with edit access; if you don't see Settings under Onboarding Suite, ask an admin to grant it from Roles and Permissions.
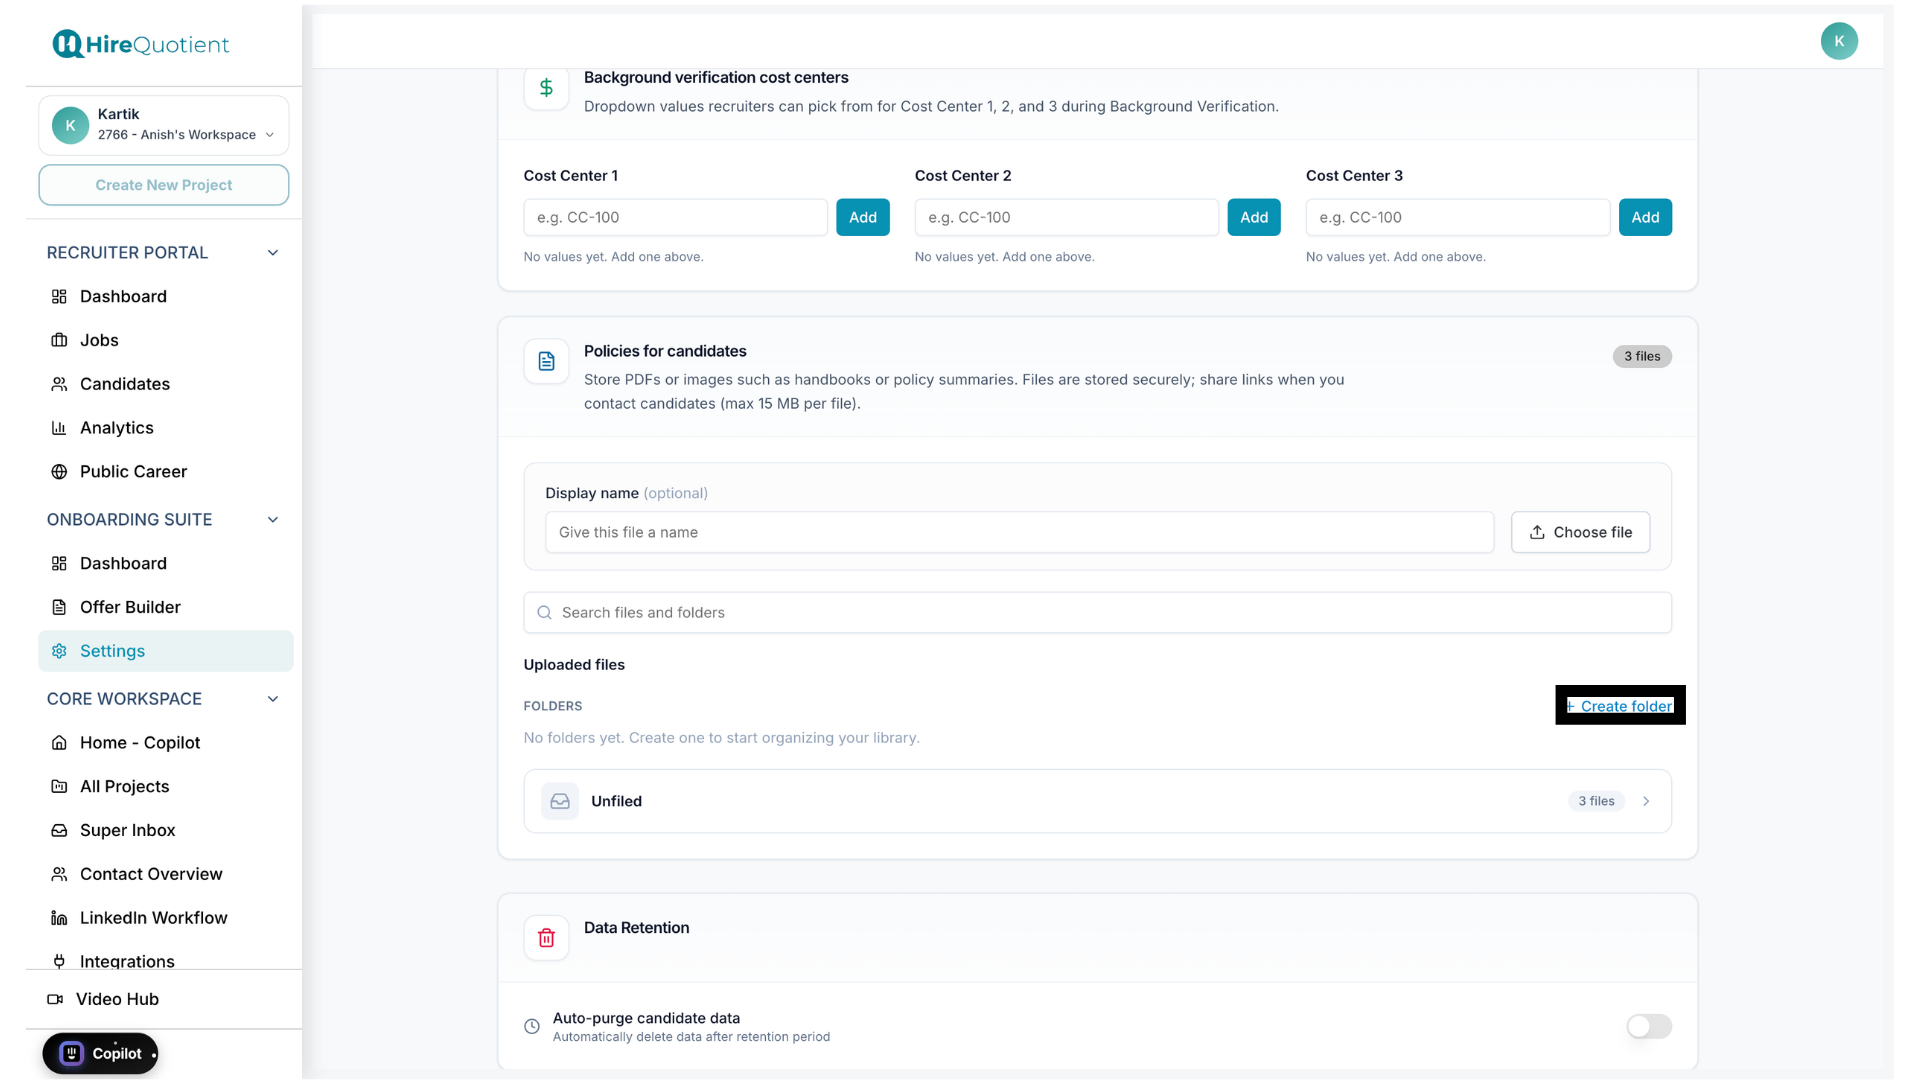
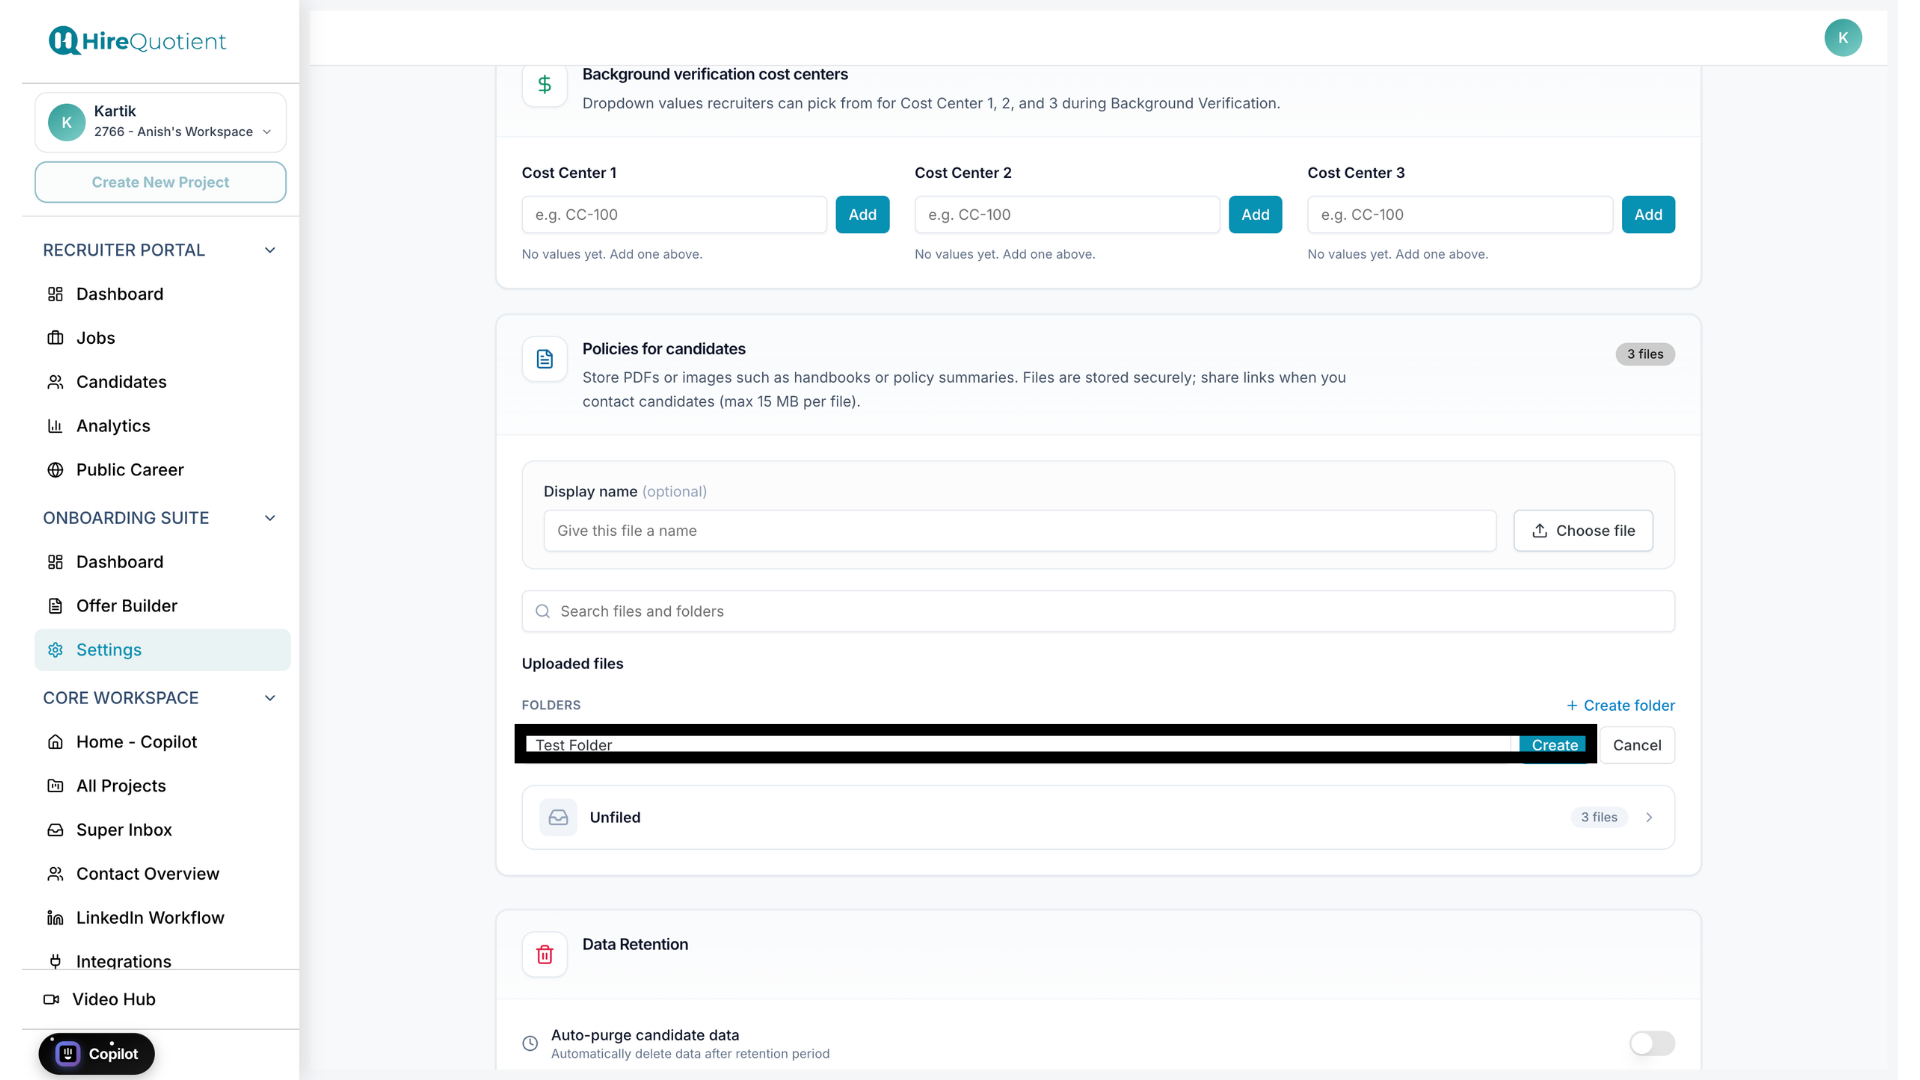
- 2Name the folder and create itType a name into the field that appears and click Create. The new folder appears under Folders showing 0 files until you add something to it. You can rename or delete a folder later from its three-dot menu: renaming just relabels it, and deleting it does not delete the files inside — they move to Unfiled, or stay visible in any other folder they're tagged into.
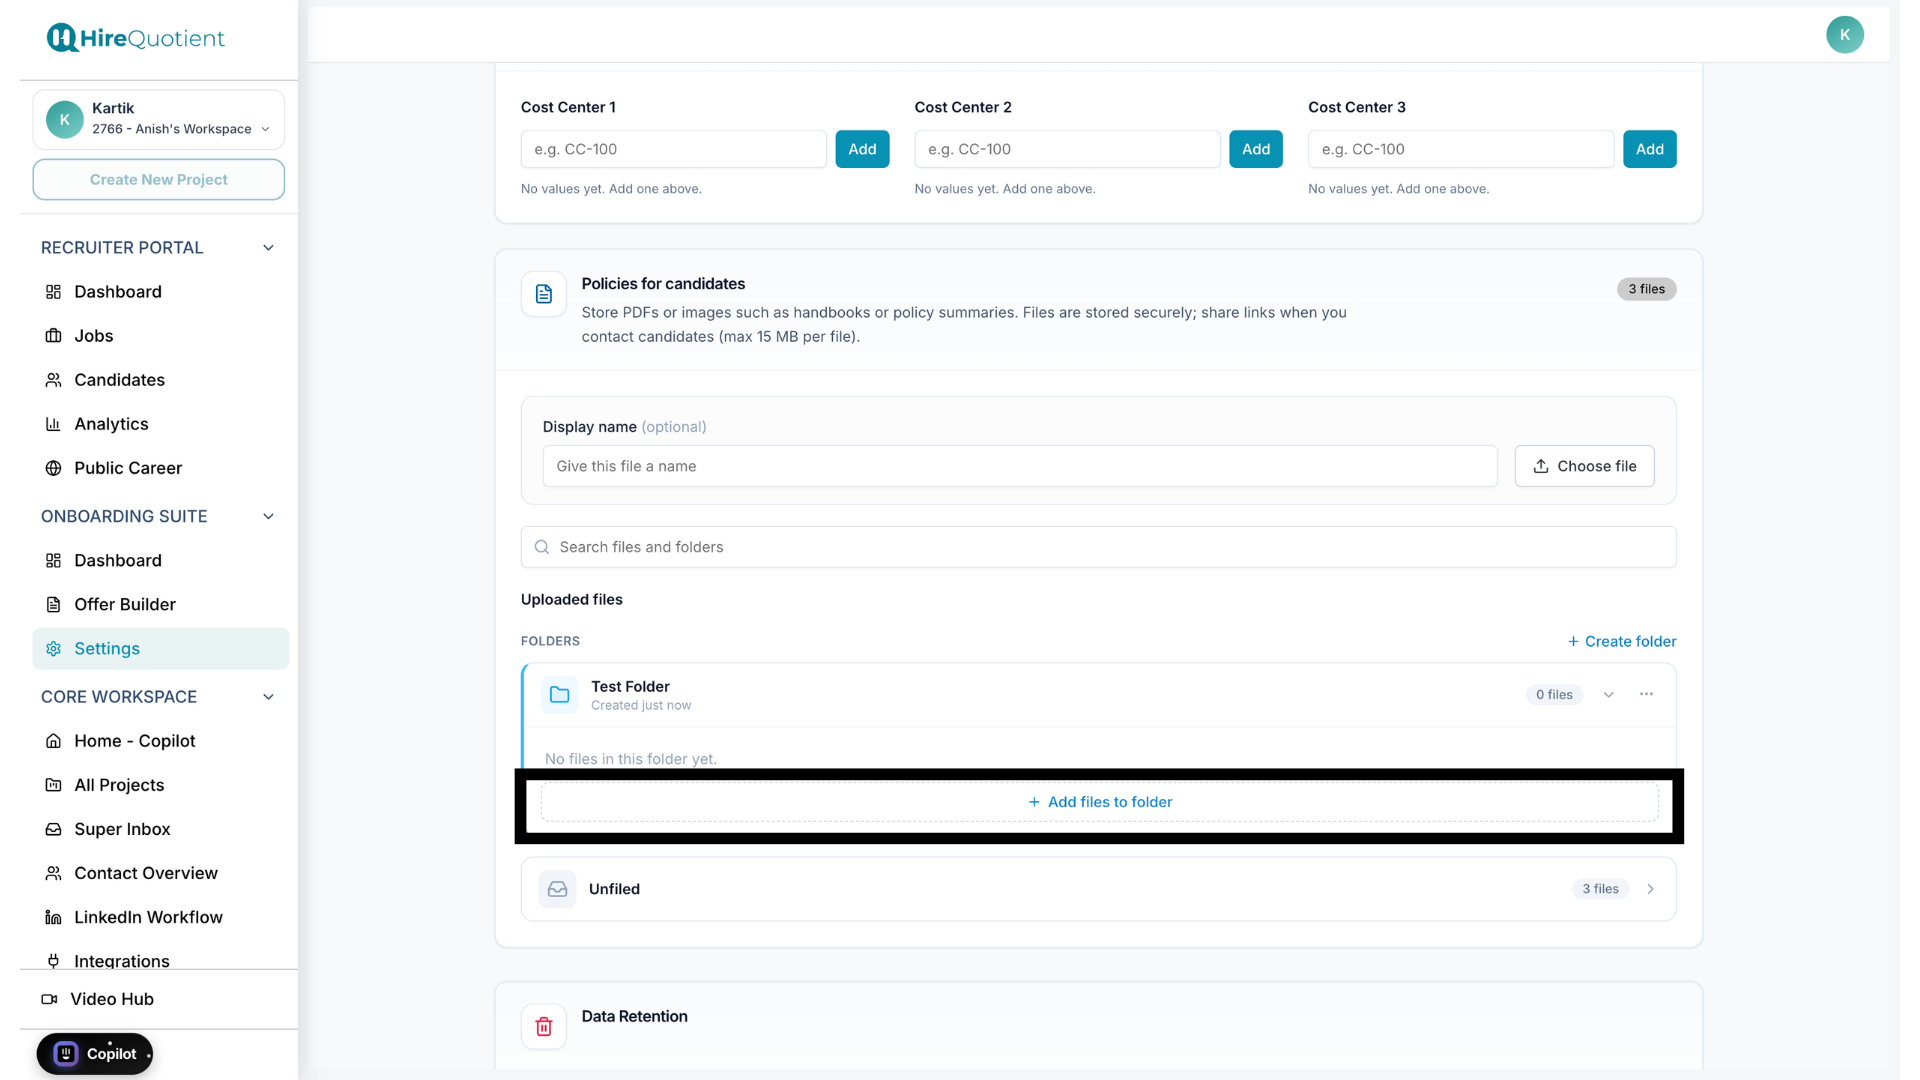
- 3Open Add files to folderInside the new folder's card, click + Add files to folder. This opens a dialog with two ways to add files, rather than uploading directly.
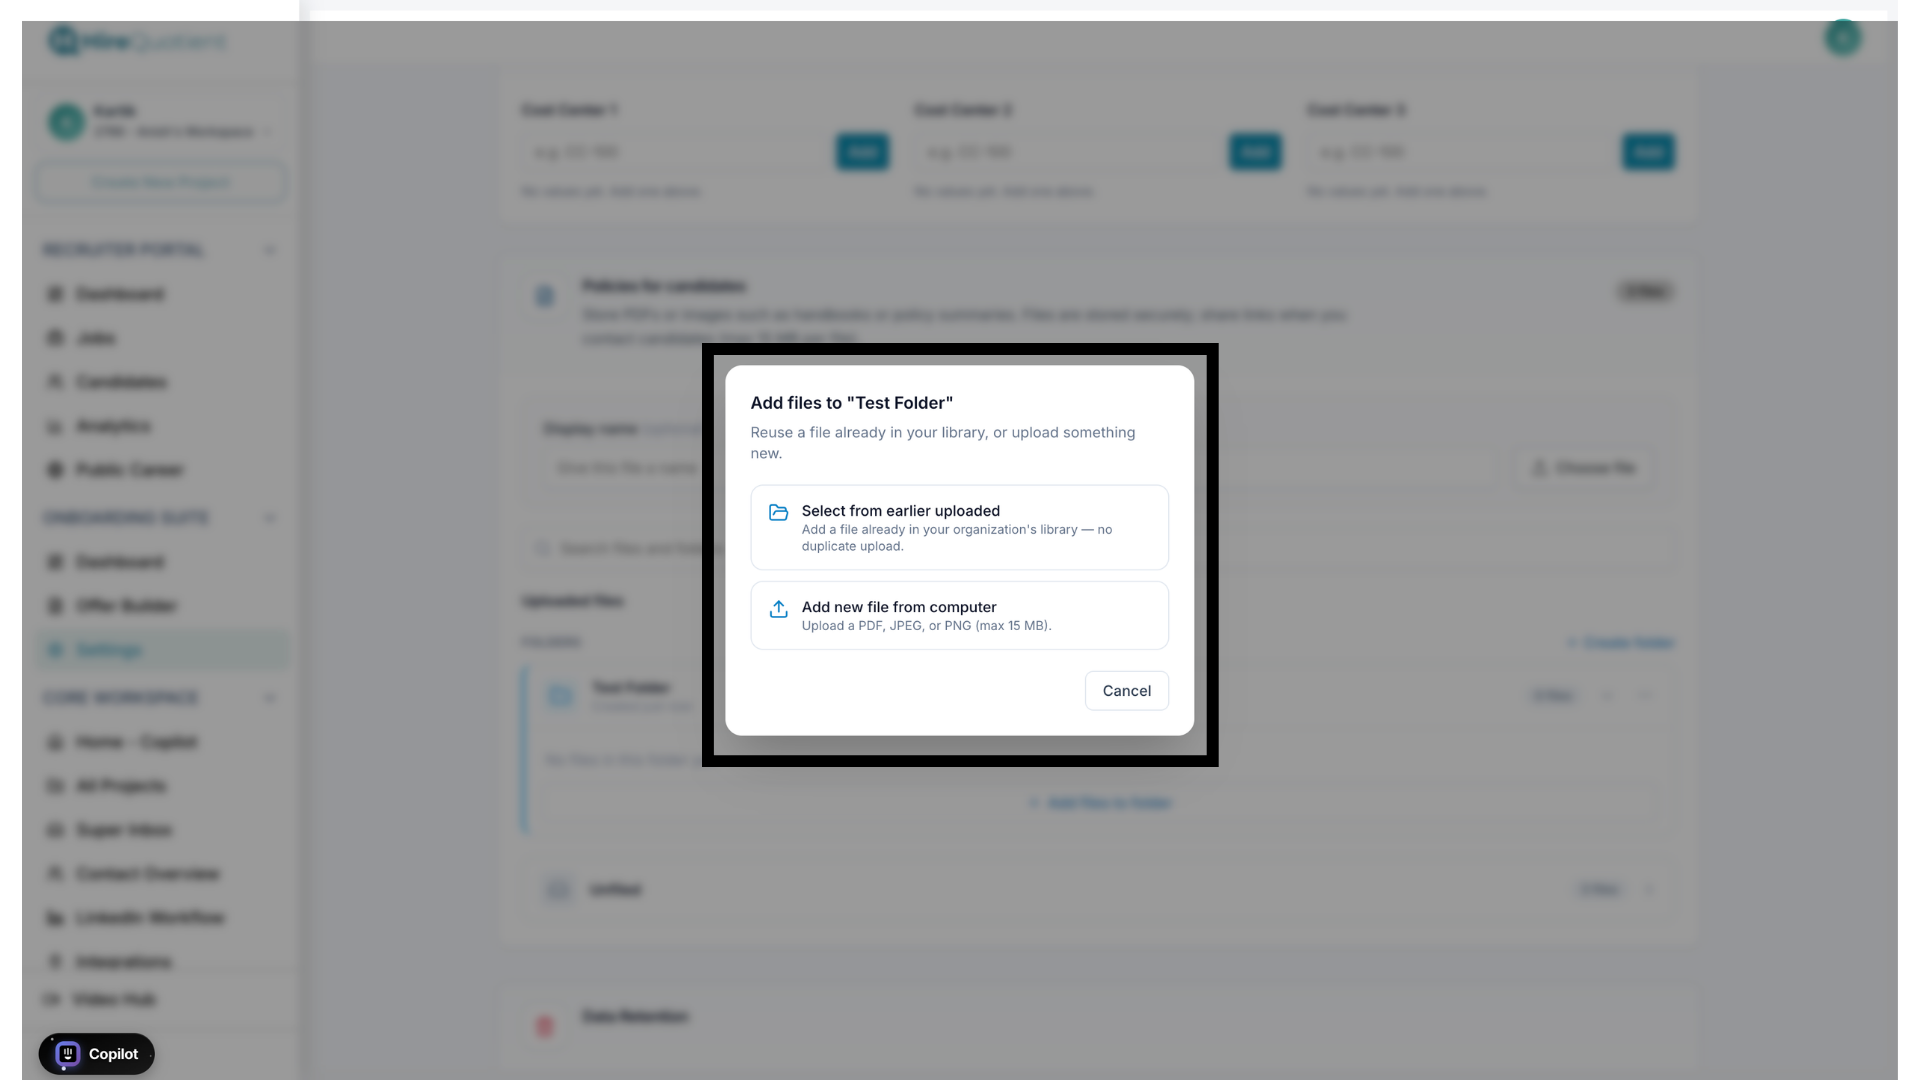
- 4Pick how to add the filesChoose Select from earlier uploaded to reuse a file already in your organization's library with no duplicate upload, or Add new file from computer to upload a new PDF, JPEG, or PNG (15 MB max).
- 5Confirm the files were addedThe folder card now lists each file by name with view and Remove options, and its file count updates. A file isn't locked to one folder: click the folder icon on a file row to check or uncheck which folders it belongs to, or drag the file onto a folder — it can belong to several folders at once, or none, in which case it sits under Unfiled. Removing a file from inside a folder only untags it there; the file stays in your library. Removing it from Unfiled instead permanently deletes it, which requires Admin-level access to "Register on OS" and breaks any policy links already sent to candidates. These folders become available to pull from when you build the onboarding workflow.
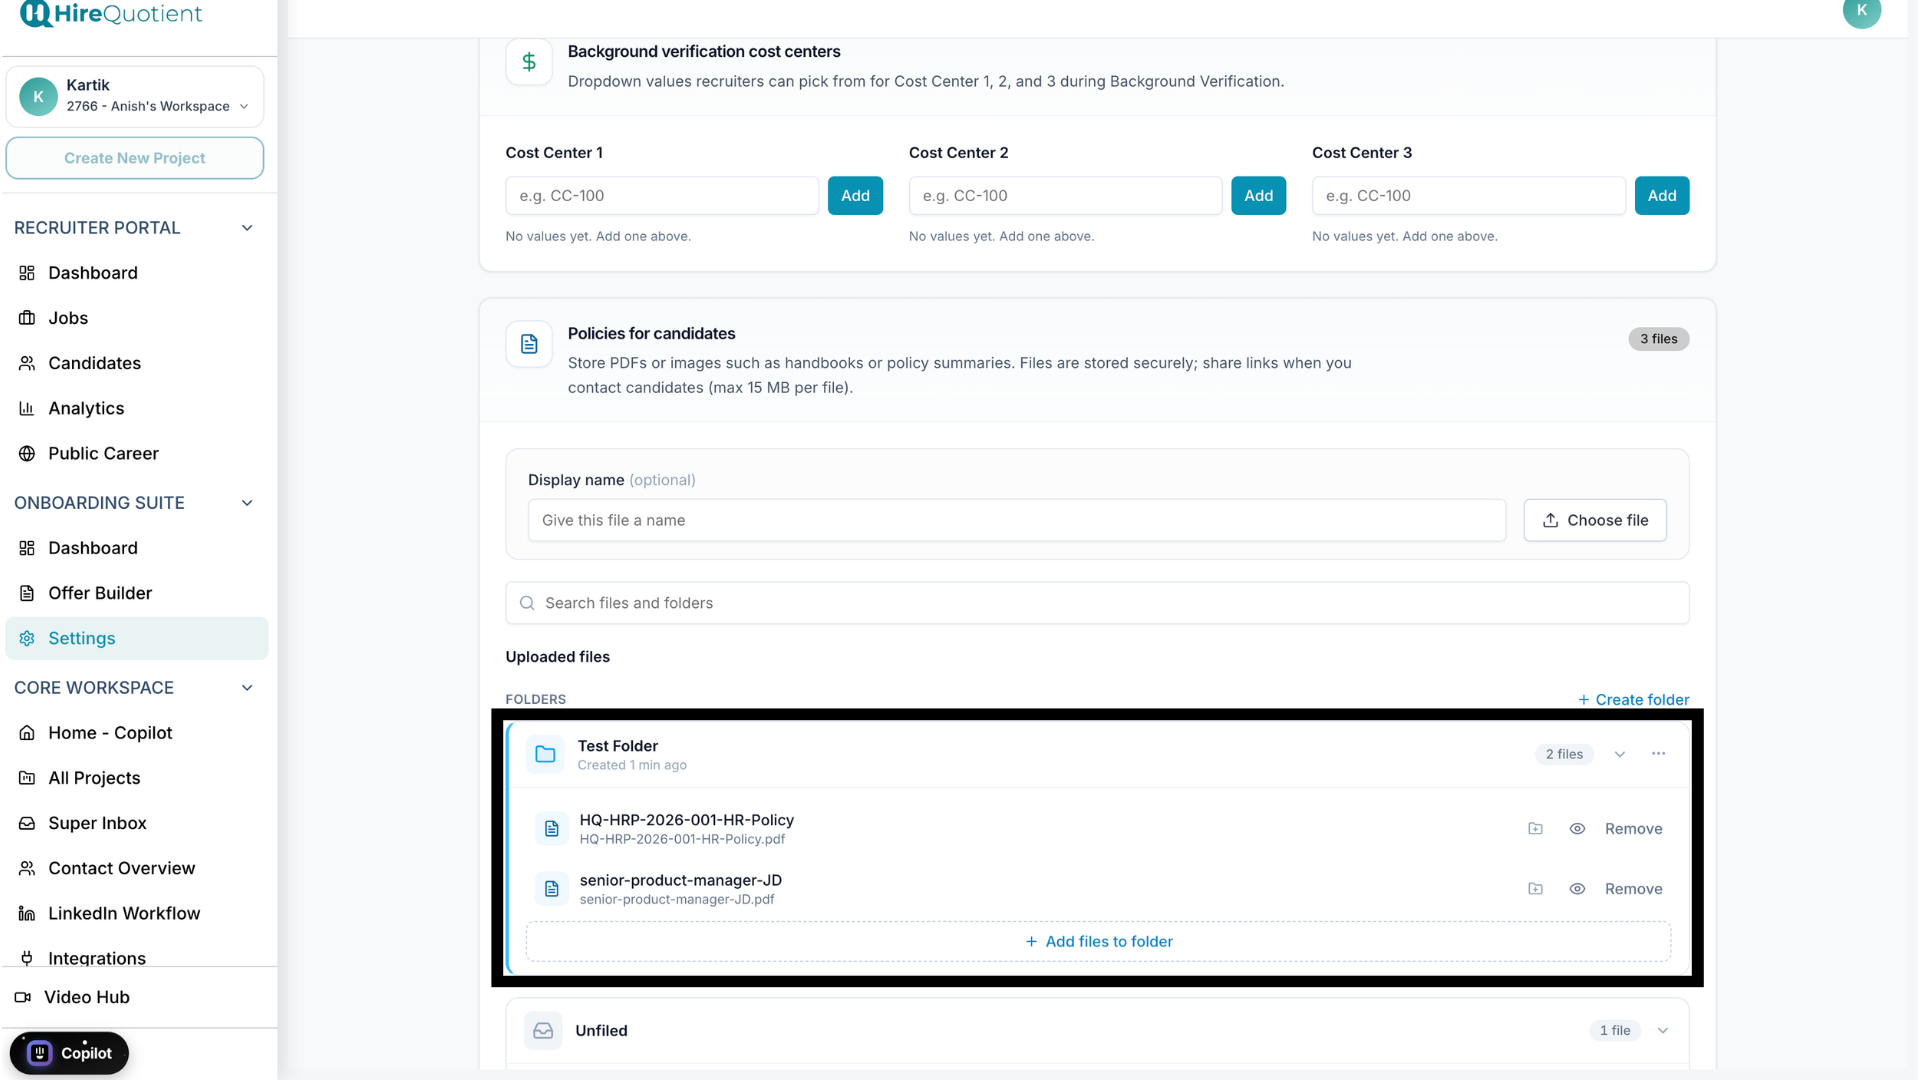
- 6Set up background verification cost centersCost Center 1, 2, and 3 are dropdown fields recruiters fill in on a candidate's background verification form. Set up the values in Settings before recruiters need them: type a value under the slot you want (for example CC-100) and click Add, or press Enter, to add it to the list. Click the trash icon next to a value to remove it. Values only appear as dropdown options during background verification once they've been set up here.
- 7Configure data retentionData retention controls how long candidate data is kept after onboarding completes. Toggle "Auto-purge candidate data" on and pick a retention period from the dropdown, 1, 3, 5, 7, or 10 years, defaulting to 7, to have data deleted automatically. Leave it off to keep data indefinitely, for organizations that need to retain records for compliance or audit reasons.
- 8Configure Do Not Hire retentionDo Not Hire retention controls how long a candidate stays flagged as Do Not Hire before that flag is automatically cleared. Choose 3 months, 6 months, 12 months, or Permanent, which means the flag never clears on its own. Like the folder and policy library setup above, this setting is org-wide: it applies to your whole workspace, for every recruiter.