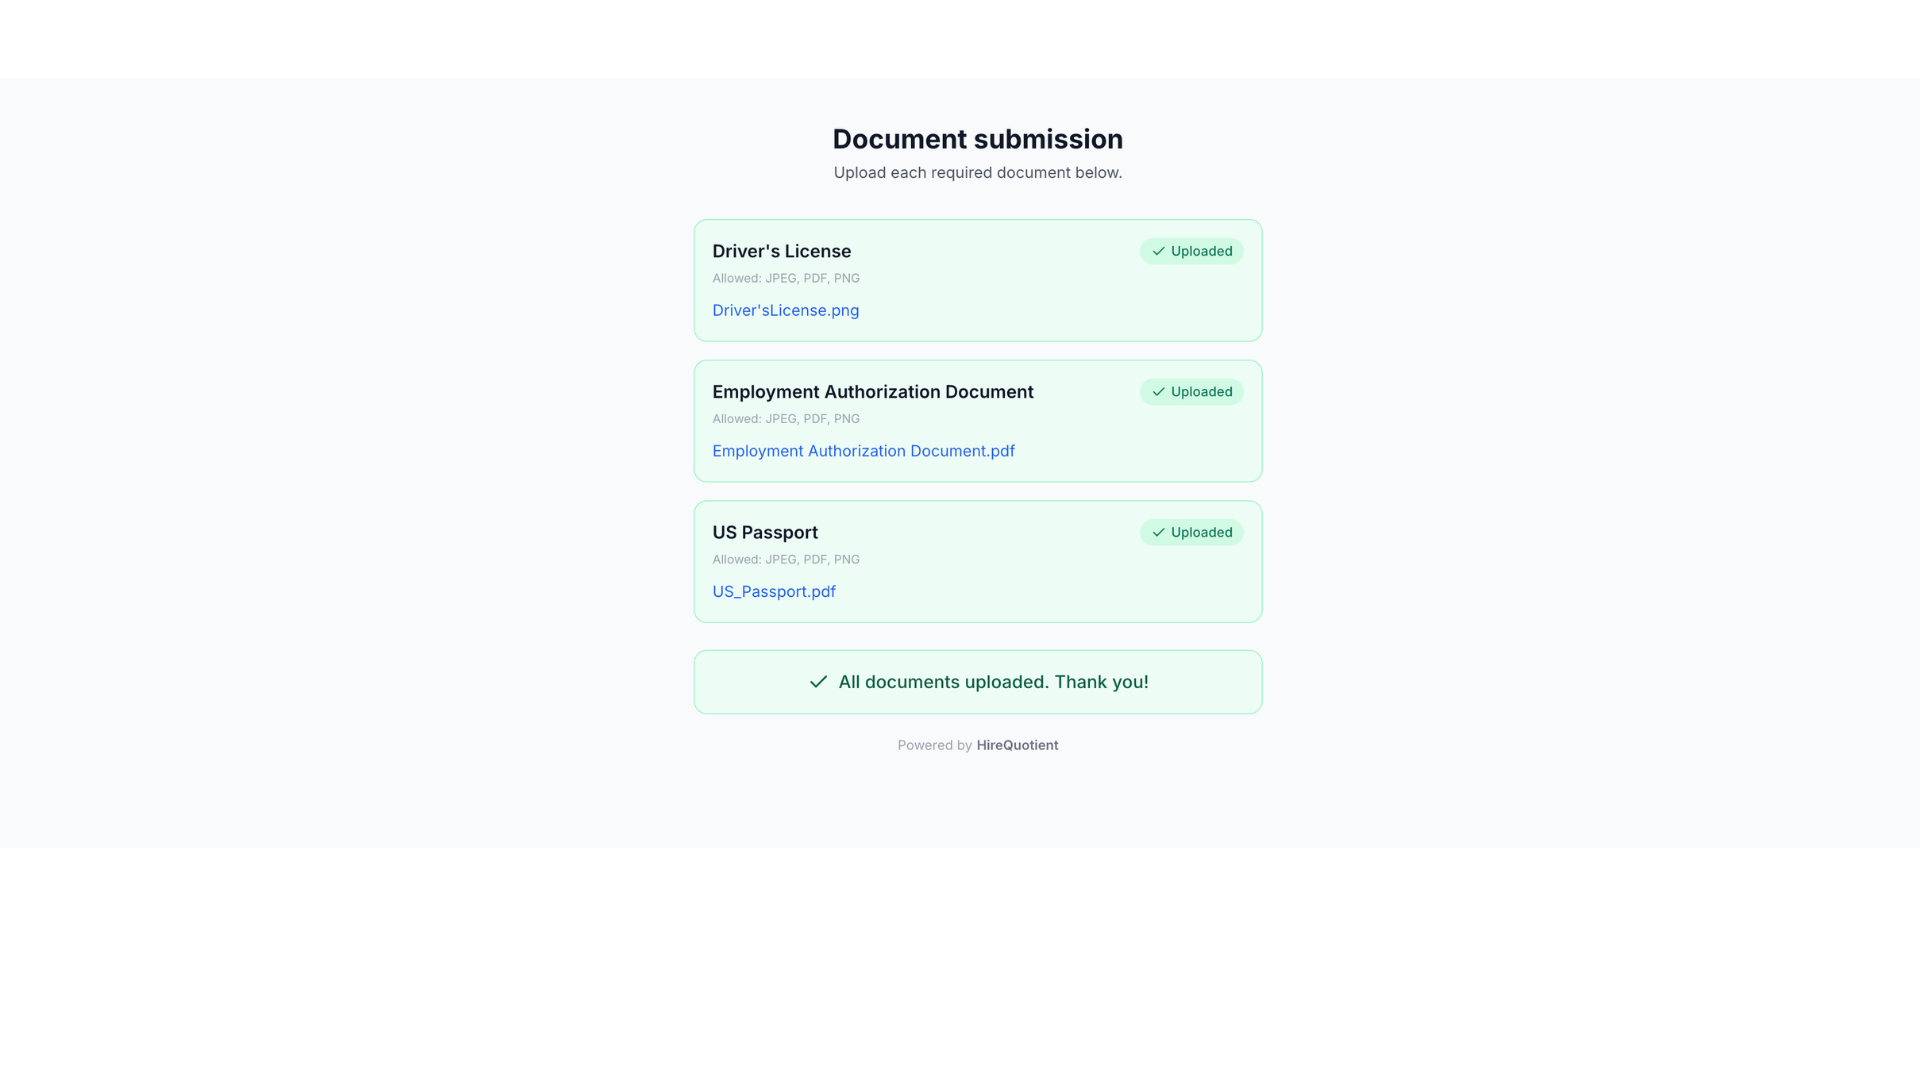
Candidate view: signing policies and uploading documents
How candidates sign company policies and upload required documents via emailed links, with no login required.
3 min read
Once the recruiter confirms the onboarding sequence, candidates handle Sign Policies and Collect Documents entirely through emailed links, no login required. Each outreach fires only after the prior one completes: policies first, then documents. This walks through both candidate-facing flows end to end.
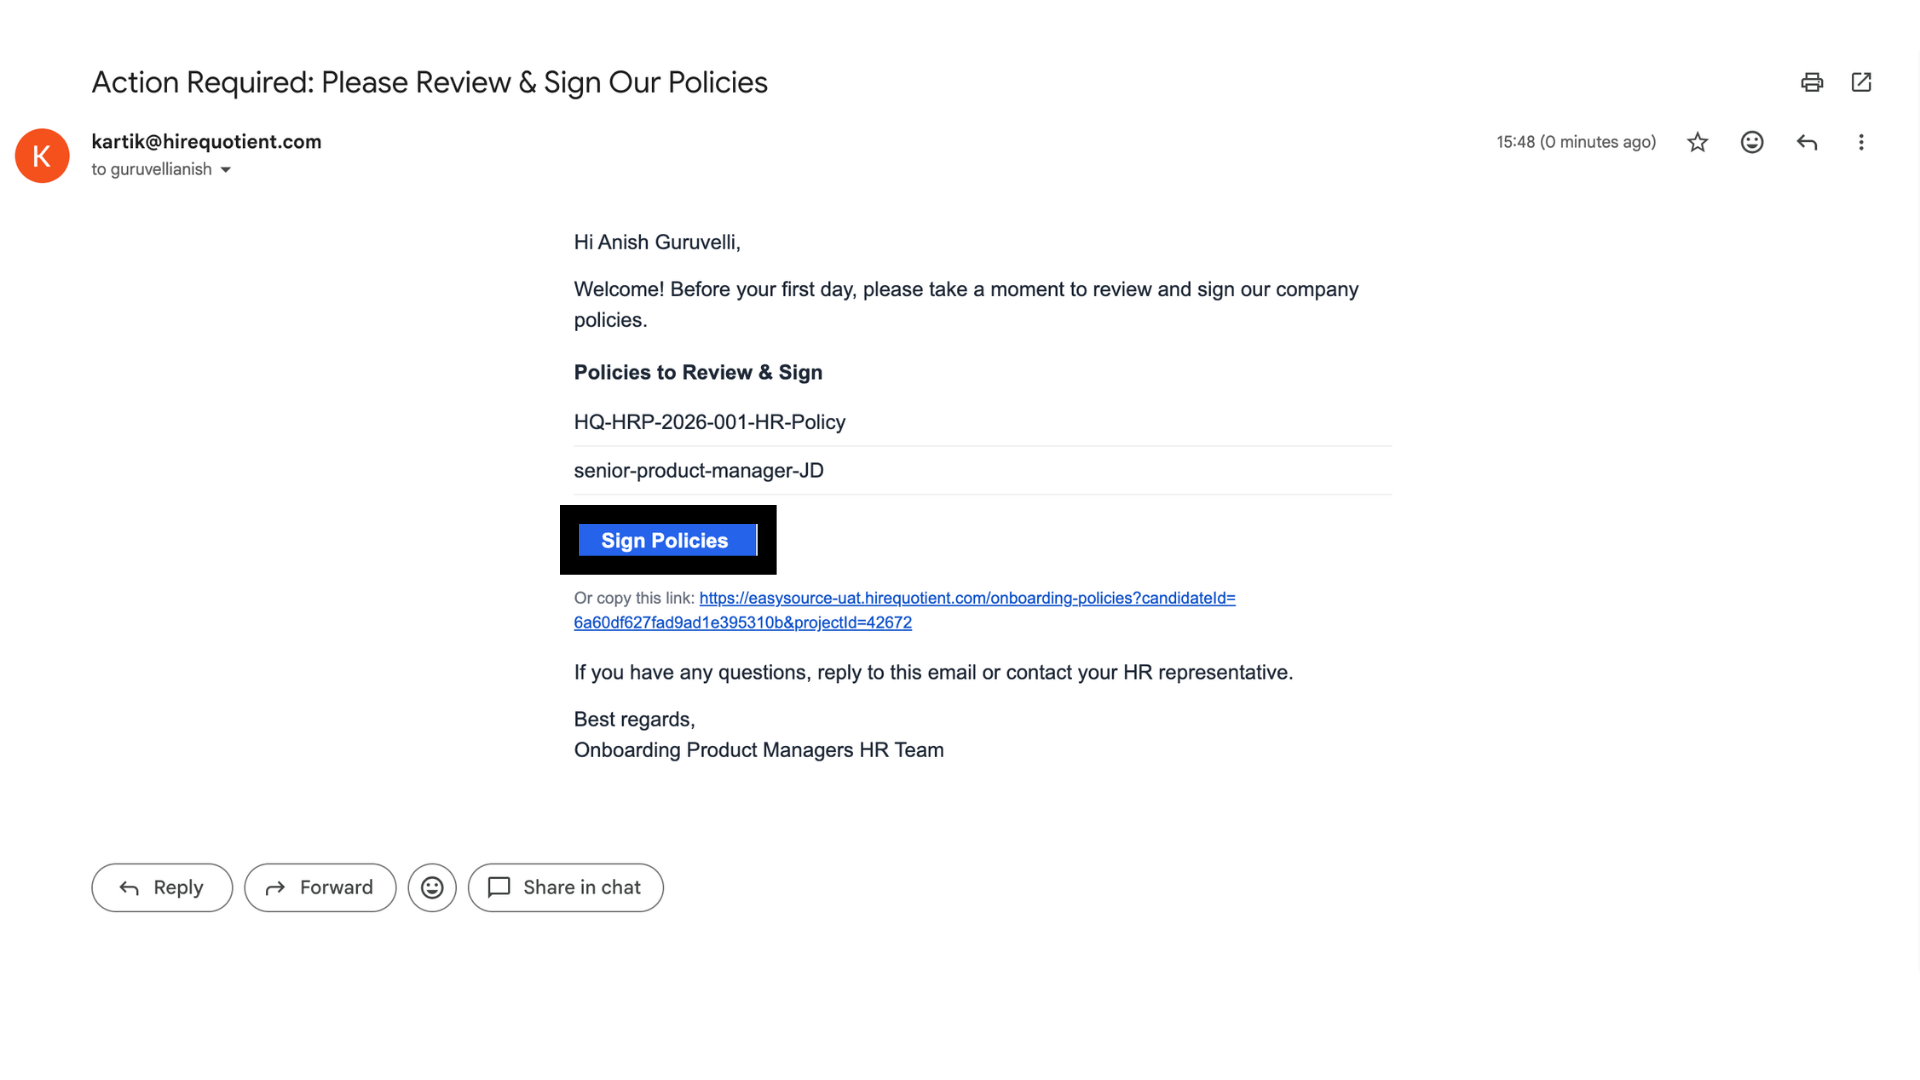
- 1Mail Policies email arrivesCandidate email. Once the recruiter confirms the workflow sequence, the first outreach fires: "Action Required: Please Review & Sign Our Policies," listing each policy file with a Sign Policies button, or a copy-paste link, leading to the candidate-facing page.
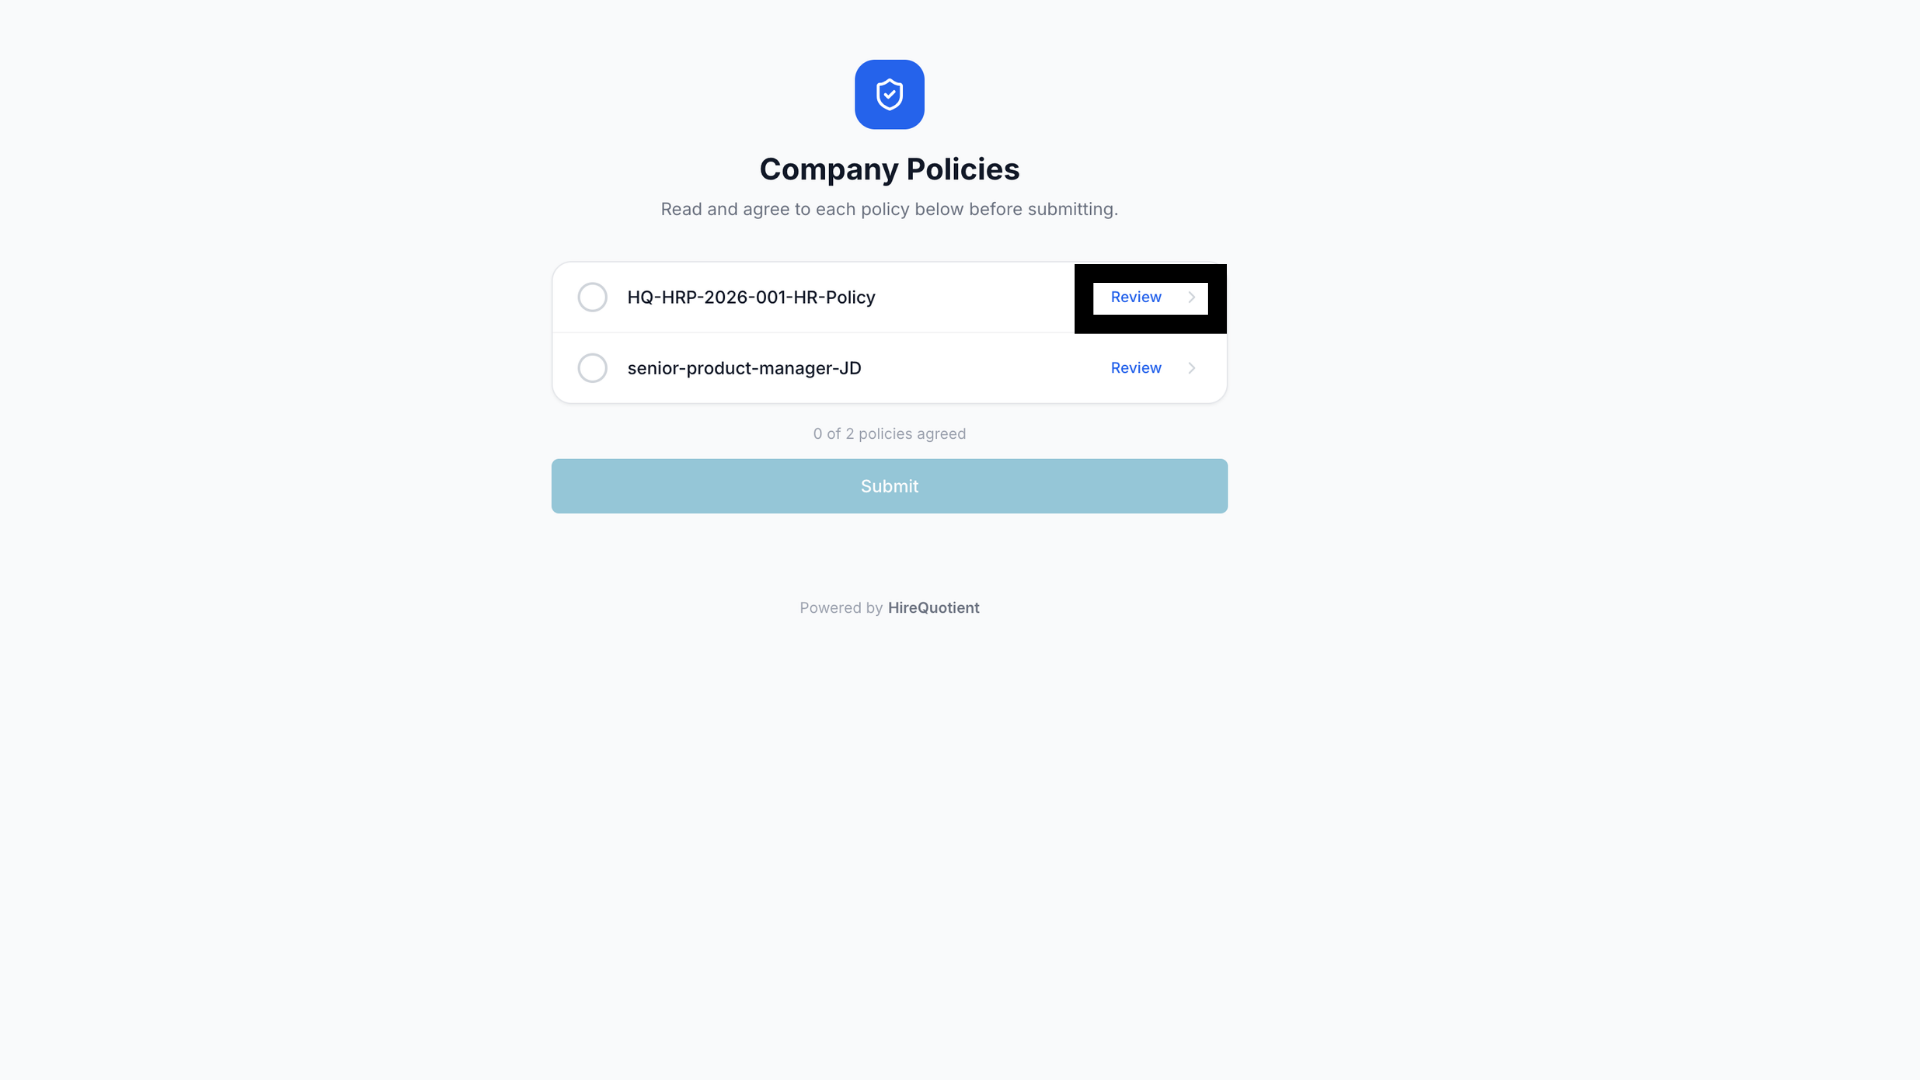
- 2Company Policies pageCandidate-facing page. Titled "Company Policies," it lists each policy with a Review link and tracks progress, showing "0 of 2 policies agreed." Submit stays disabled until every policy is reviewed and agreed to.
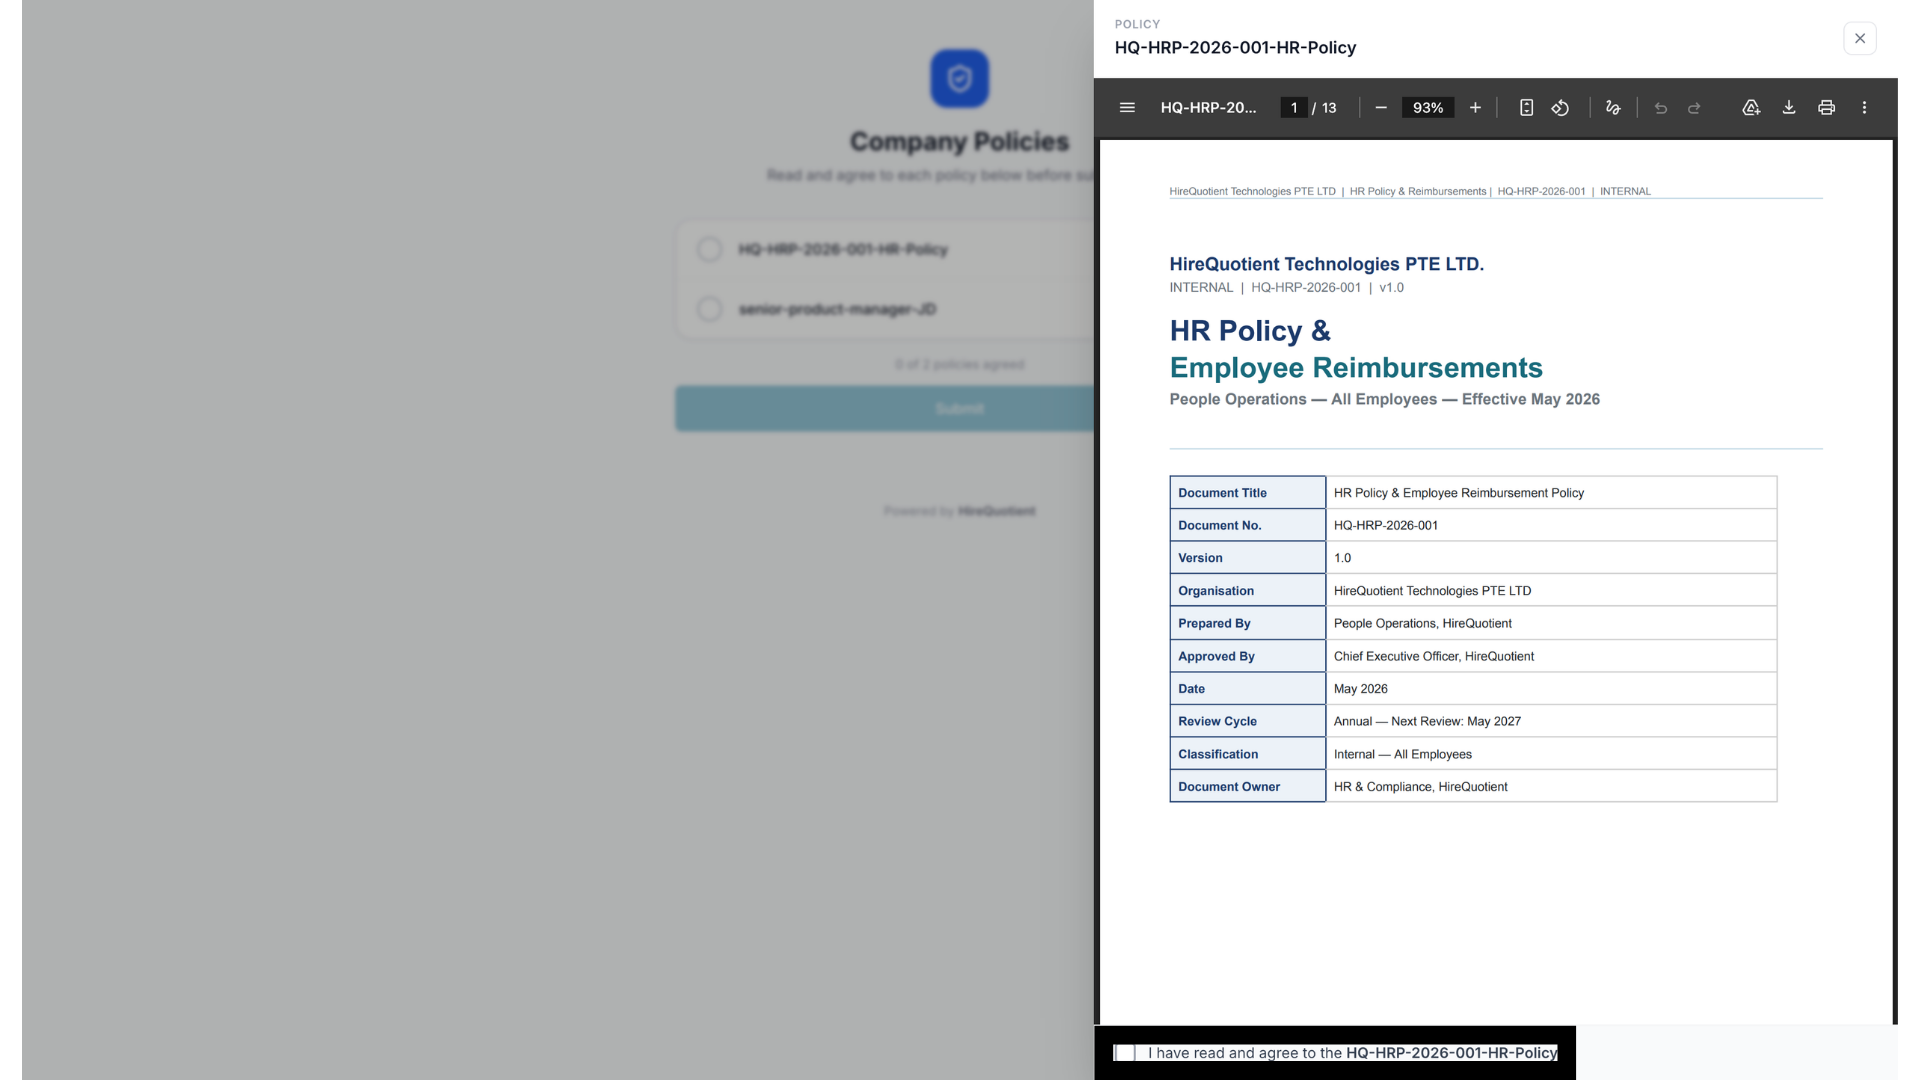
- 3Review each policy documentCandidate-facing document viewer. Clicking Review opens the policy PDF; the candidate reads it and ticks the checkbox "I have read and agree to the [policy name]" before closing the viewer and moving to the next policy.
- 4Both policies marked AgreedCandidate-facing page. Once every policy is checked, its status flips from Review to Agreed and the counter reads "2 of 2 policies agreed." The candidate then clicks Submit.
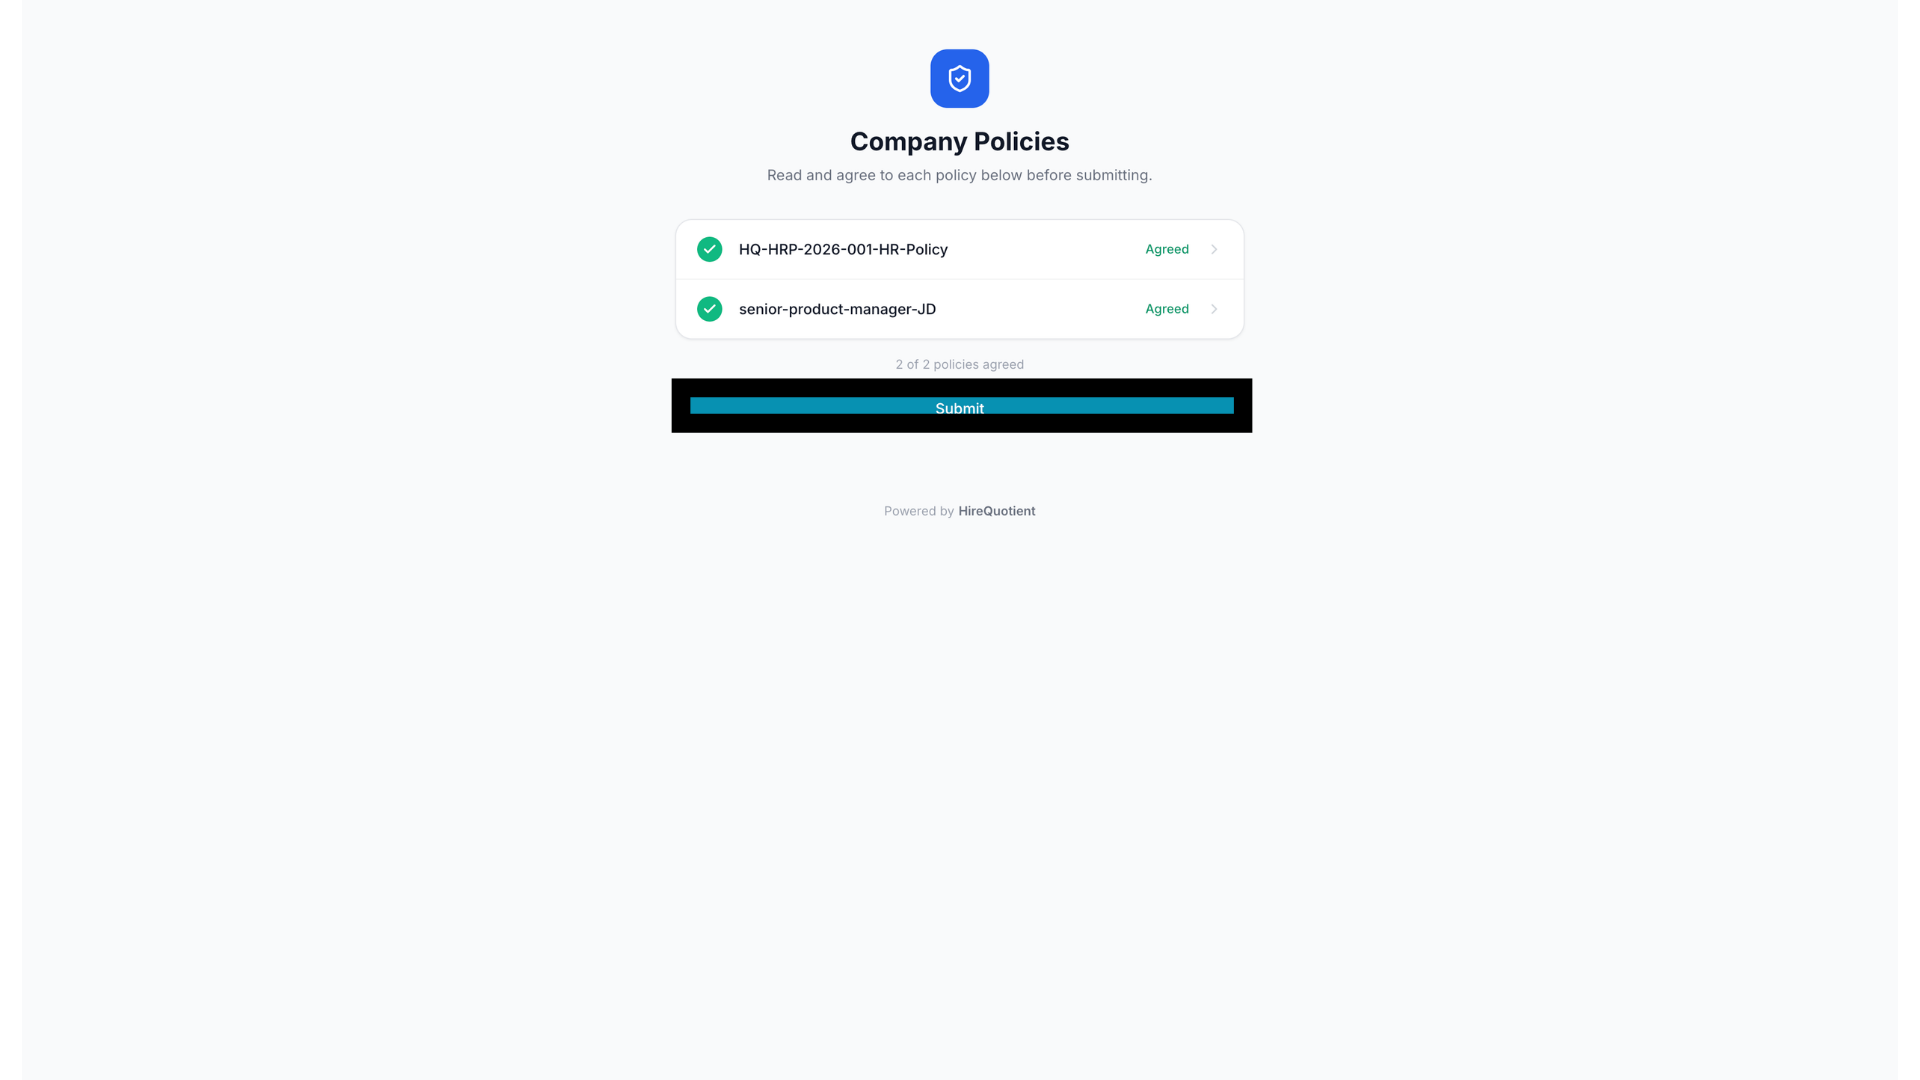
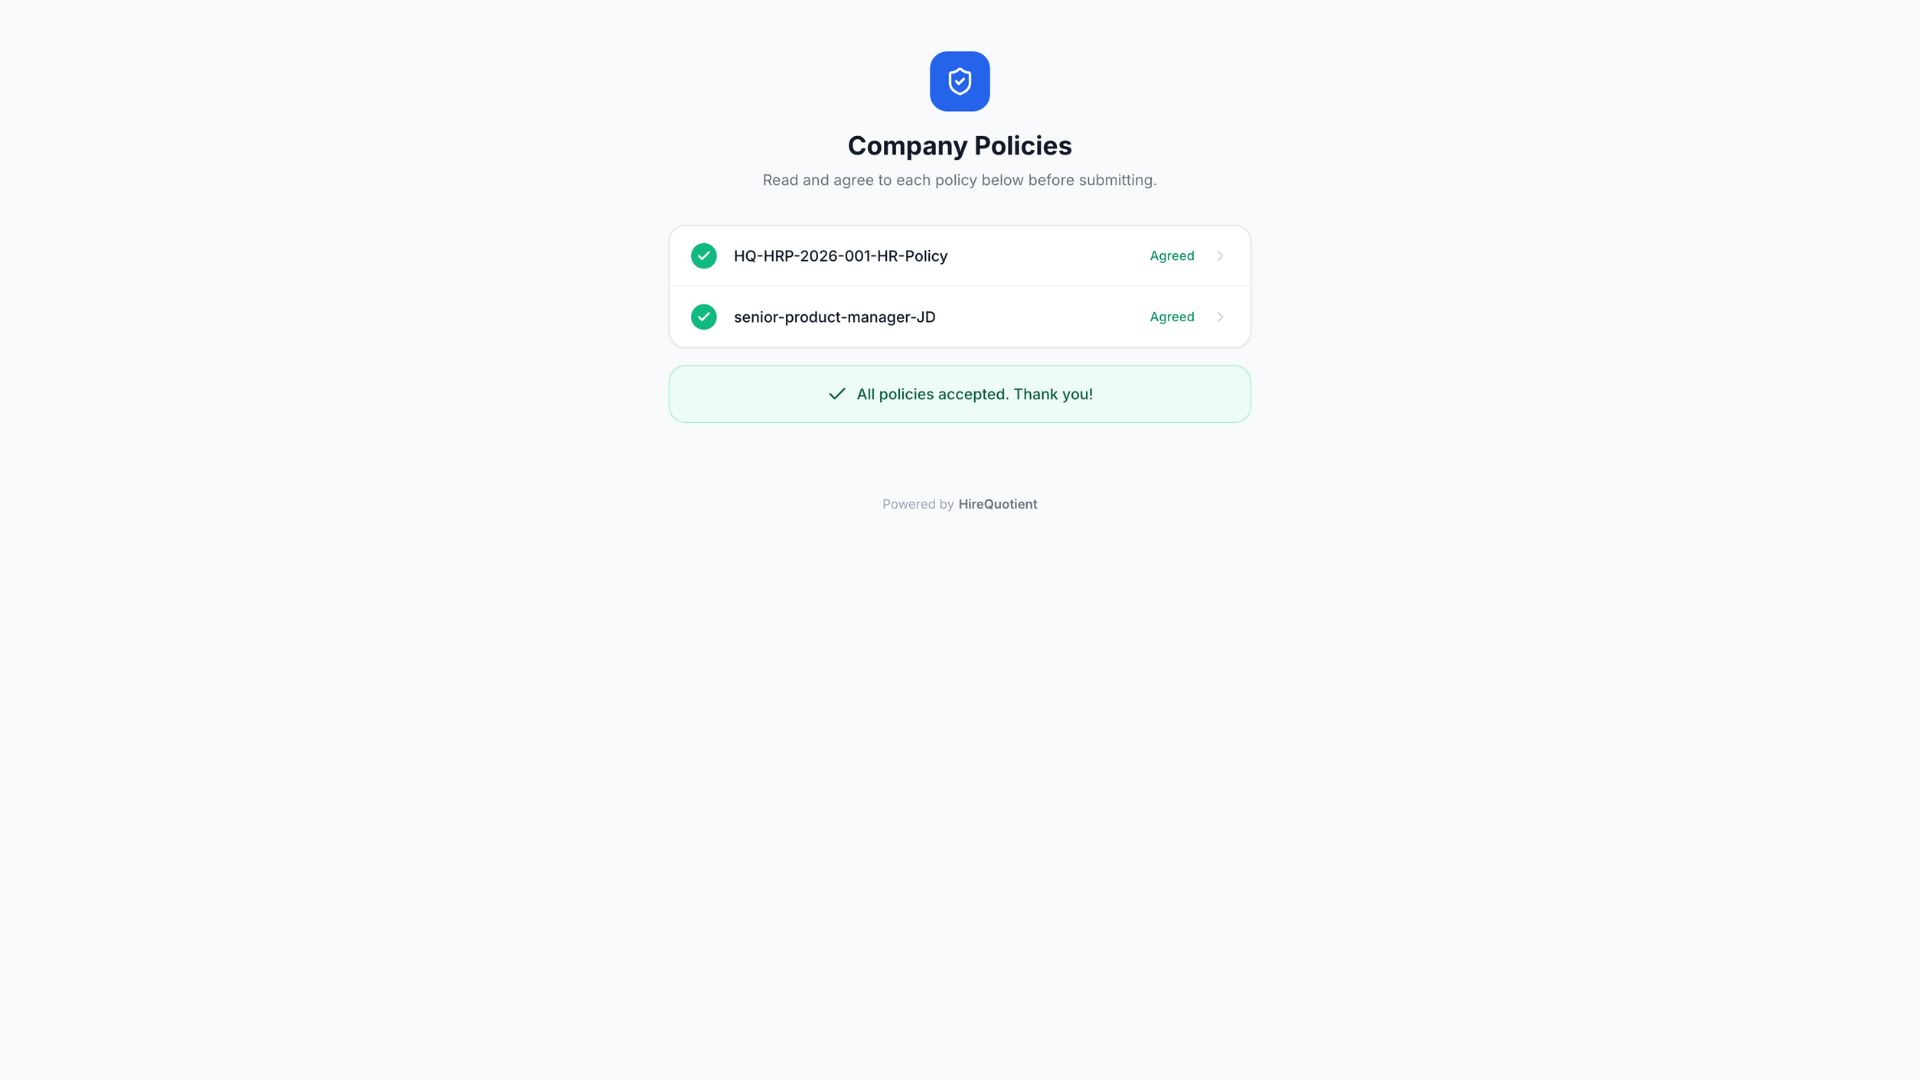
- 5Policies confirmation screenCandidate-facing page. It confirms "All policies accepted. Thank you!" with both policies marked Agreed. This completes the Mail Policies task and triggers the next step in the sequence.
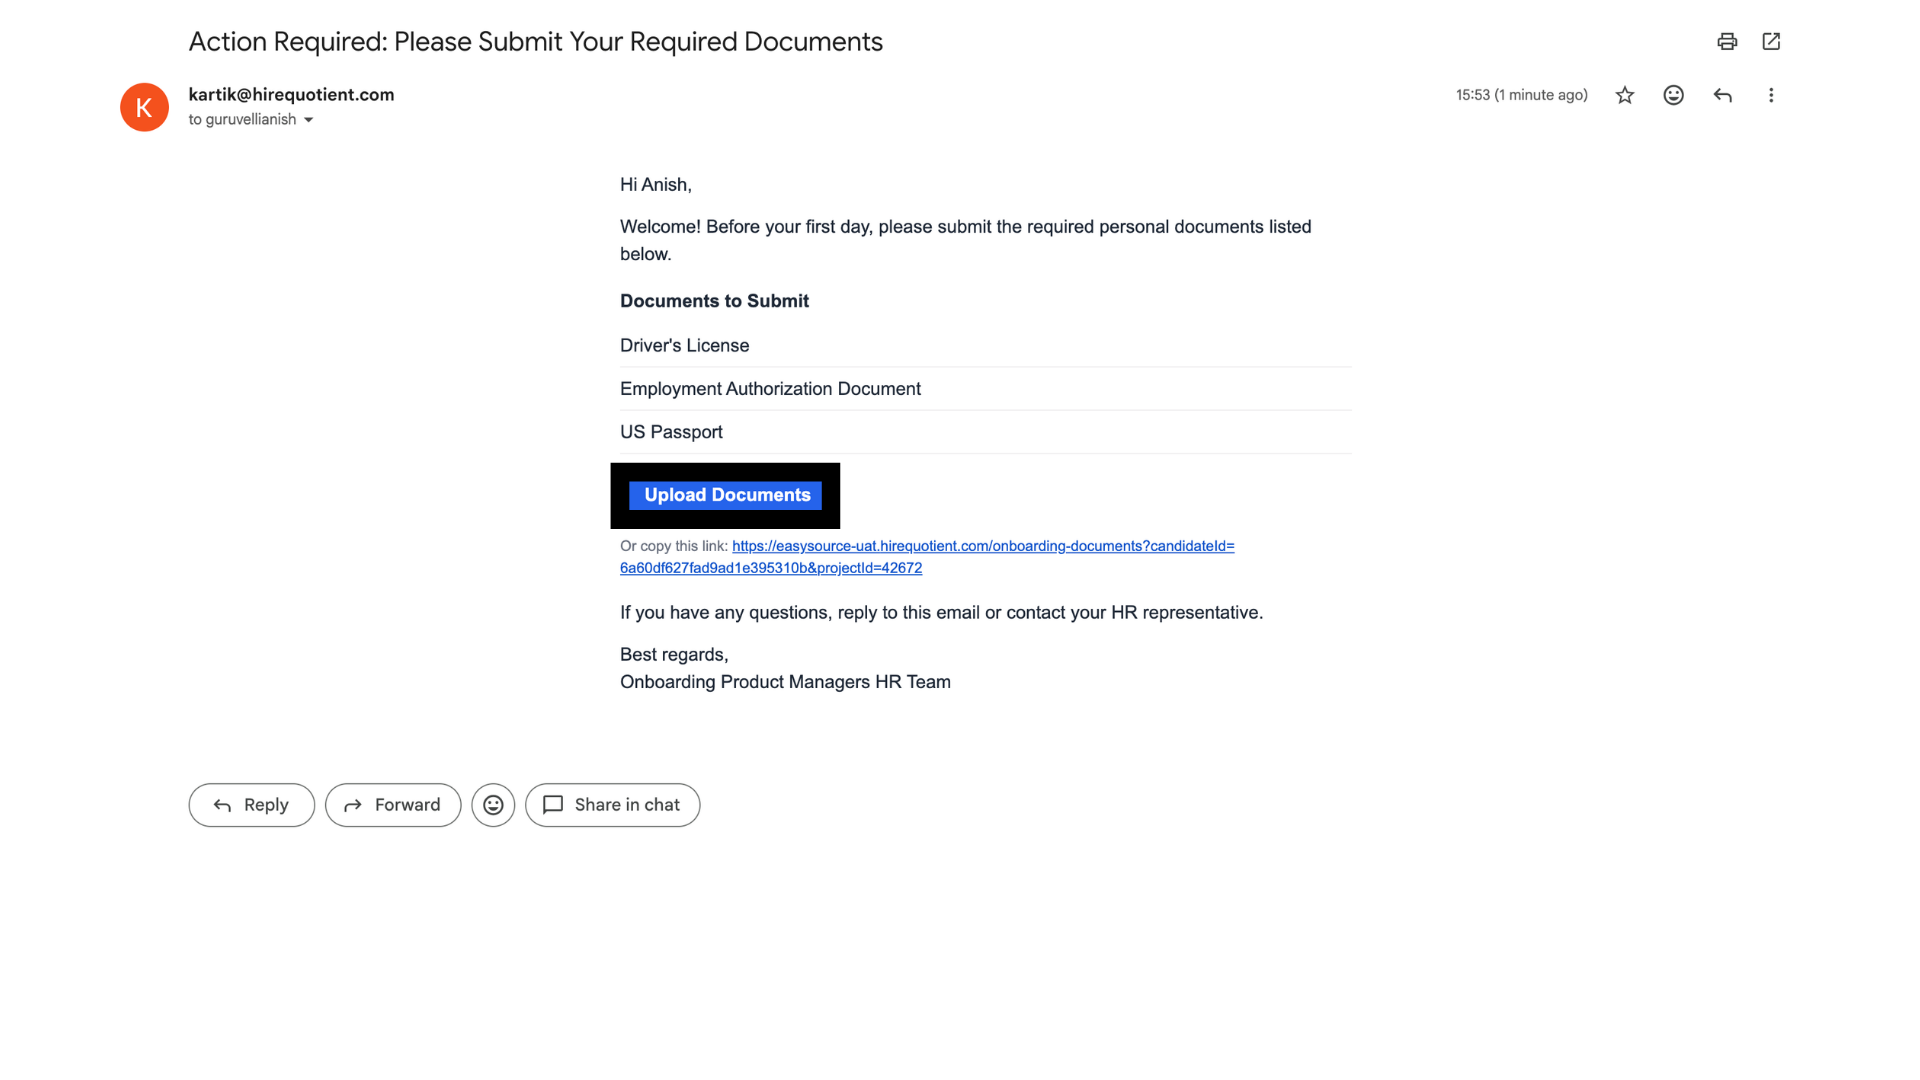
- 6Collect Documents email arrivesCandidate email. Because policies were just signed, the Collect Documents outreach fires automatically next: "Action Required: Please Submit Your Required Documents," listing each required document with an Upload Documents button.
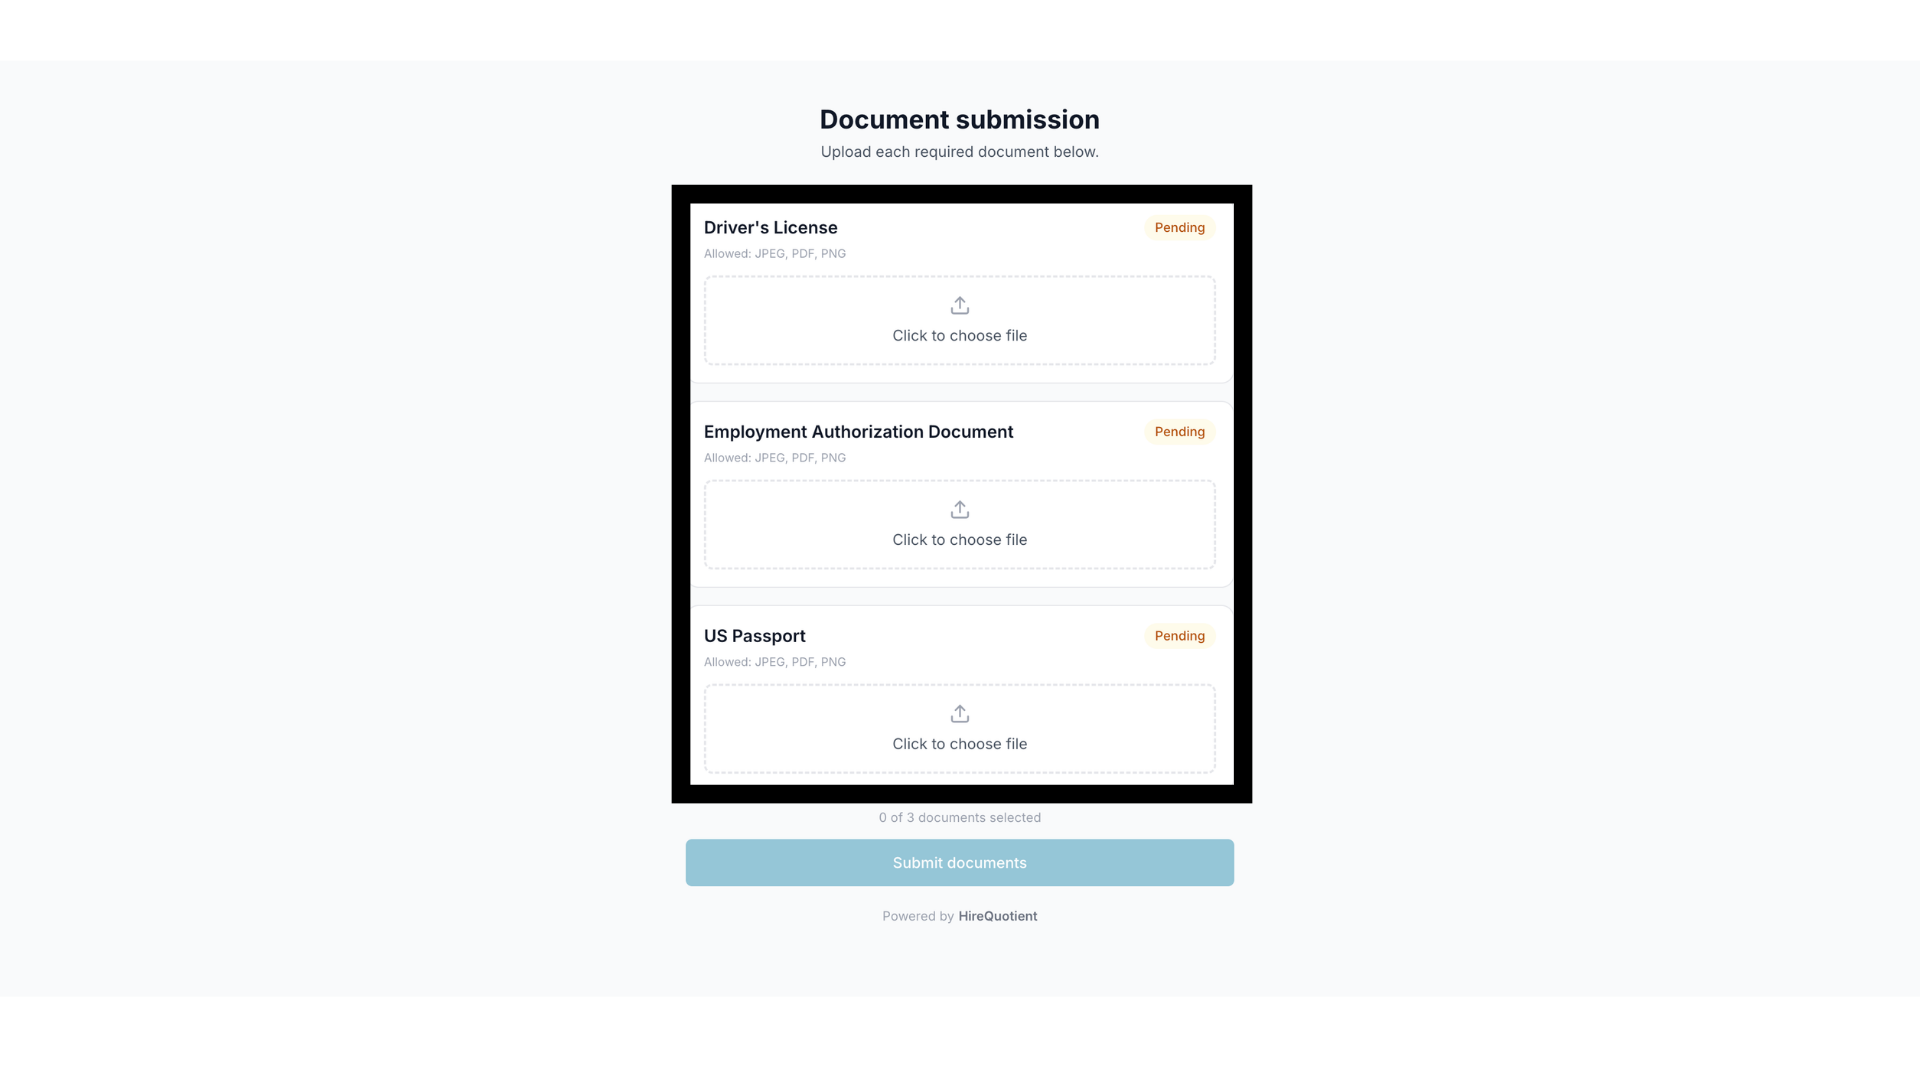
- 7Document submission pageCandidate-facing page. Titled "Document submission," it lists each required document, such as a driver's license or passport, marked Pending with a "Click to choose file" upload zone and its allowed formats. If the recruiter locked a document slot when setting it up, that document shows "Filled by recruiter" instead of an upload zone, and the candidate doesn't need to do anything with it.
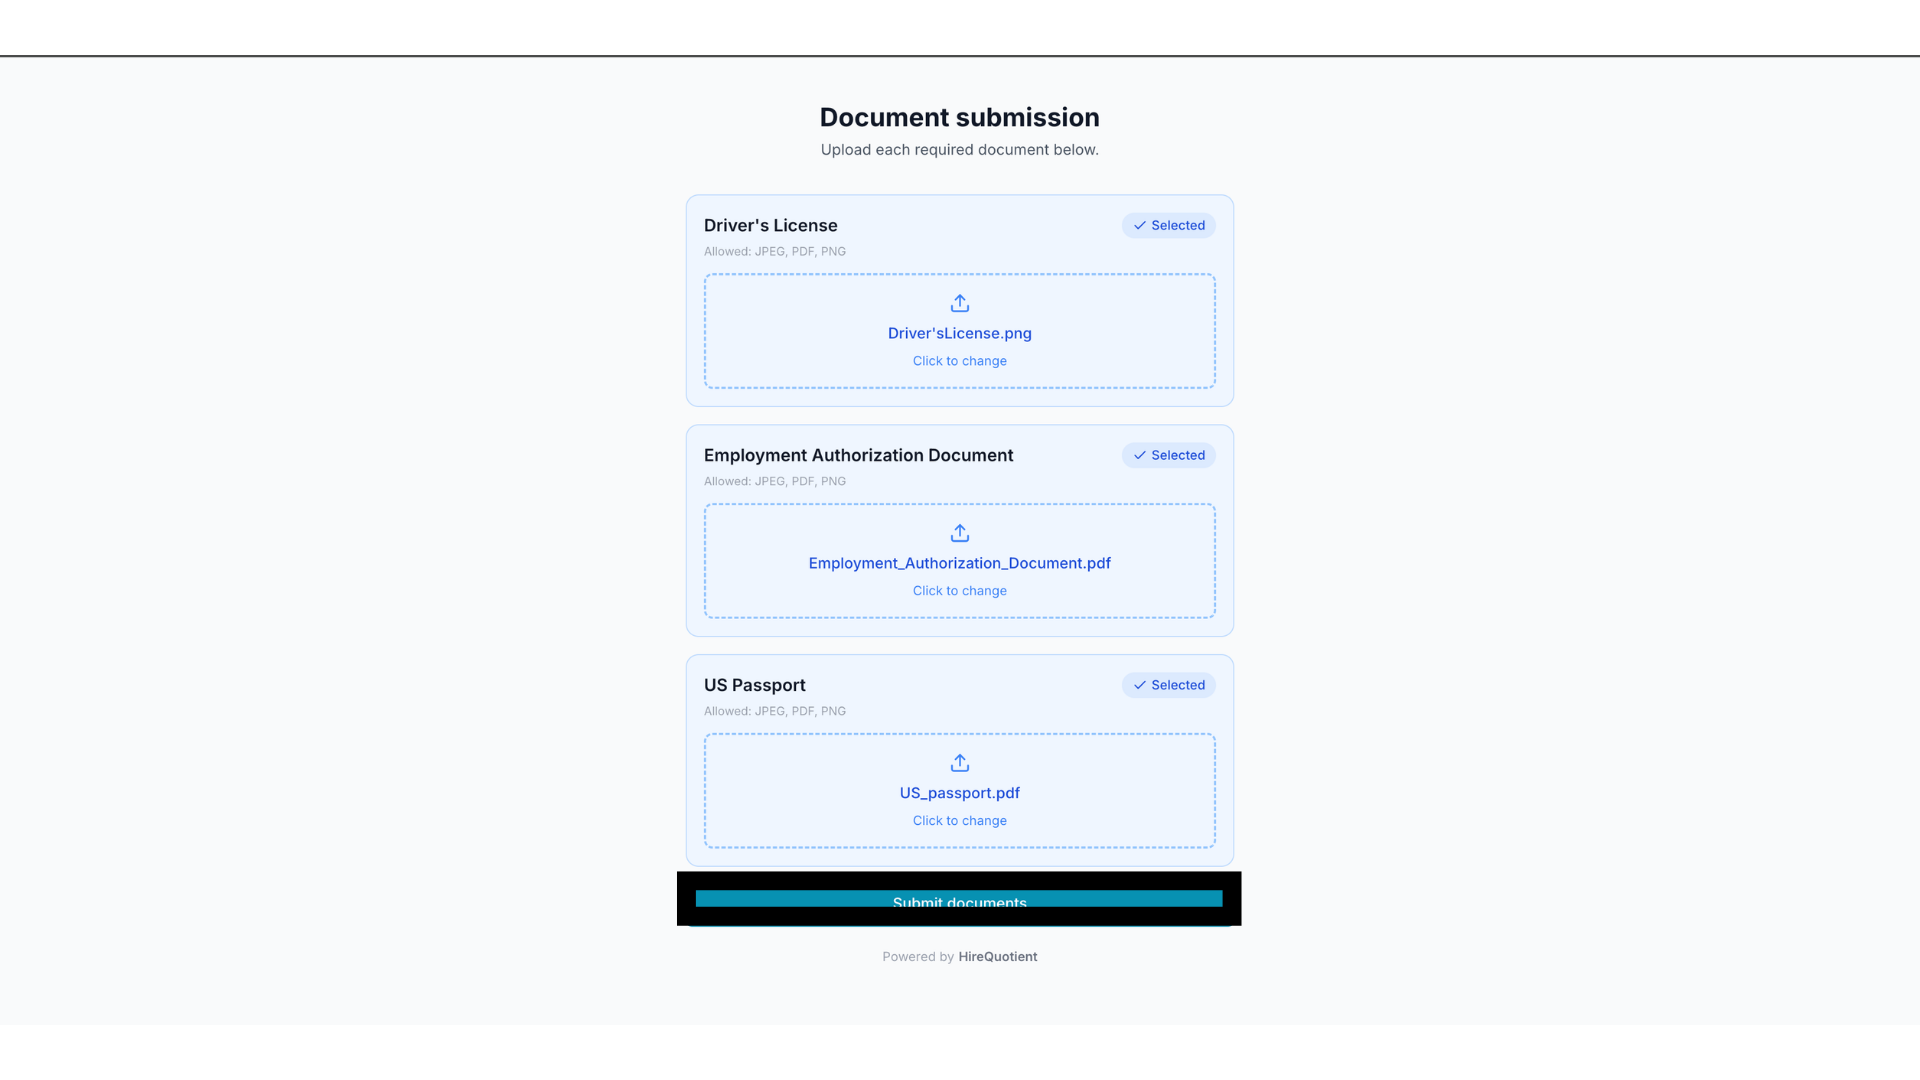
- 8Files selected for each documentCandidate-facing page. Once a file is chosen, that document's status changes to Selected and shows the filename with a "Click to change" option. The candidate submits once every document has a file attached.
- 9Documents confirmation screenCandidate-facing page. It confirms "All documents uploaded. Thank you!" with every document marked Uploaded. Next up is "Candidate view: reviewing and accepting the offer," covering the offer letter mail that follows.